Overview
Groups are the primary organizational unit for simulating phishing testing. Groups allow you to sort and group targets for testing, import targets from active directories (AD) or learning management systems (LMS), and parse testing data on a per-group basis. The primary group management tool is the Manage Groups page.
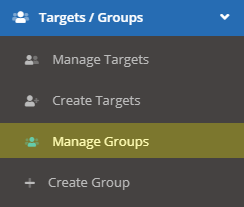
Navigate to Targets / Groups > Manage Groups.
The Manage Groups Page
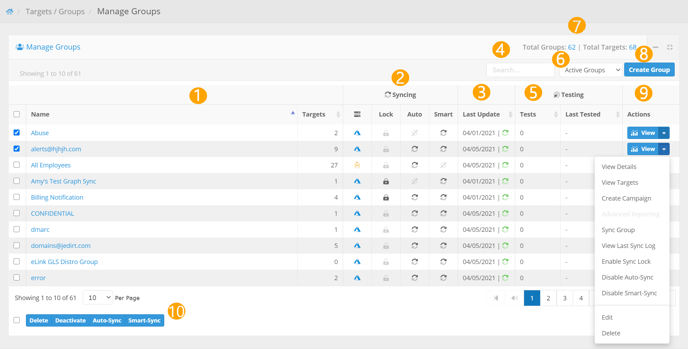
1. Groups Column: This column displays the groups on your account, the number of targets in the groups, and checkboxes that allow you to perform mass actions (10) on the groups. Click "Name" or "Targets" to sort the groups, respectively.
2. Syncing: This column displays the third-party integration type and sync settings for the group. Hover the mouse over the third-party integration icons for information about the integration configuration. Click the icon to manually re-sync the group with the AD or LMS.
If auto or smart sync is enabled for a group, a will be displayed in the respective column.
- Auto: Auto-sync will automatically re-sync the group with the AD or LMS that the group is associated with, every night at midnight.
- Smart: Smart-sync will dynamically add targets that are added to the group to any ongoing tests on the group. Does not apply to campaigns that have Target Selection turned on (selecting individual targets to include in the campaign) or to immediate send type campaigns (campaign must be a scheduled send type).
- Lock: Lock will prevent you from manually syncing the group (either from the Manage Groups page or the Integration Store page). Auto-Sync will still occur for a group that is locked.
3. Last Update: This column displays the date of the last time the group was updated.
4. Search Bar: Use the search bar to filter the group table by group name or number of targets.
5. Testing: This column displays information about tests on the group. The "Tests" column represents the number of times the group has been tested. "Last Tested" displays the date of the most recent test on the group.
6. Group Status Select: Use this select bar to toggle between active/inactive groups display.
7. Groups Overview: This section displays the number of groups on the account, and the total number of targets across all groups.
8. Create Group: Click this button to create a group. For information on the process of creating a group, see article: Add / Edit a Group.
9. Actions: This column contains buttons and links that represent actions that can be taken on the groups. Click the for more options.
- View Button / View Details: This will redirect you to the group details page which will display an overview of all the data collected on the group, and a list of all the tests in which the group has participated.
- View Targets: This button will redirect you to the Manage Targets page. For more information about Target Management see article: Manage Targets.
- Create Campaign: This link will redirect you to the Campaign Wizard and auto-populate the groups field with the respective group. For more information about configuring a campaign see article: Creating a Campaign.
- Generate Report: Click this link to navigate to view a report for all tests on the group. For more information about our report generator see article: Report Generator.
- Sync Group: This button will re-sync the group with the associated AD or LMS.
- View Last Sync Log: This will display the sync log of the last AD or LMS sync. The sync log contains information about updated target/user information, targets added, and targets deactivated on sync.
- Enable/Disable Sync Lock: Lock will prevent you from manually syncing the group. Auto sync will still occur for a group that is locked.
- Enable/Disable Auto-Sync: This button will enable or disable the Auto-Sync
- Enable/Disable Smart-Sync: This button will enable or disable the Smart-Sync
- Edit: This link will open the edit group page. For more information about editing or adding groups, see article: *Adding/Editing a Group*.
- Delete: Delete the group. If a target in the group is not in another group, the target and the target's data will be deleted as well.
Note: Deleting a group will also remove all testing data associated with the group. Delete with caution.
10. Mass-Action Buttons: Mass-actions that can be performed on groups.
- Delete: Delete the selected groups.
- Activate / Deactivate: Activate / Deactivate the selected groups.
- Auto-Sync: Auto-sync will automatically re-sync the selected groups with the AD or LMS that the groups are associated with, every night at midnight.
- Smart-Sync: Smart-sync will dynamically add targets that are added to the selected groups to any ongoing tests on the groups.