Overview
Targets are the fundamental unit of simulated phishing testing. Targets always exist in groups, but you may want to edit a target's information, add or remove targets individually, or view reports on an individual target. All of these functions can be done from the Manage Targets page.
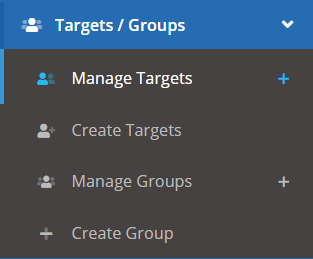
To manage targets, navigate to Targets / Groups > Manage Targets.
The Manage Targets Page
The manage targets page allows you to view and edit individual targets on a per-group basis.
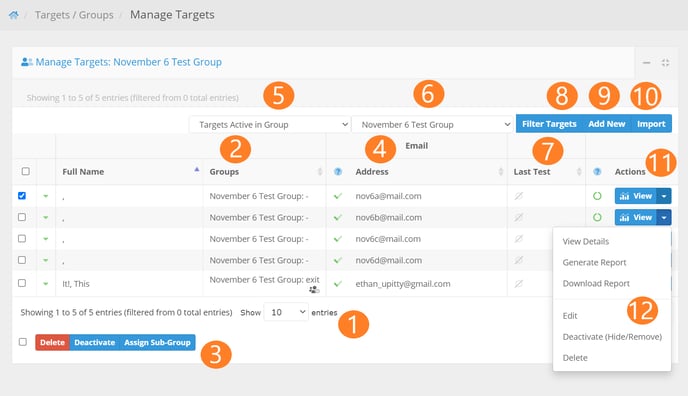
1. Entries Drop-down: Use this select menu to choose how many entries you would like the table to display.
2. Targets Column: This column will display the target's name, the groups that the target is in, and select check boxes for performing mass actions on targets. Any subgroup that the target is in will appear after the colon right of the current group being viewed. Hover the mouse over the ![]() to view a list of other groups in which the target is a member.
to view a list of other groups in which the target is a member.
3. Mass Actions: This cluster of buttons will allow you to take actions on all the selected targets.
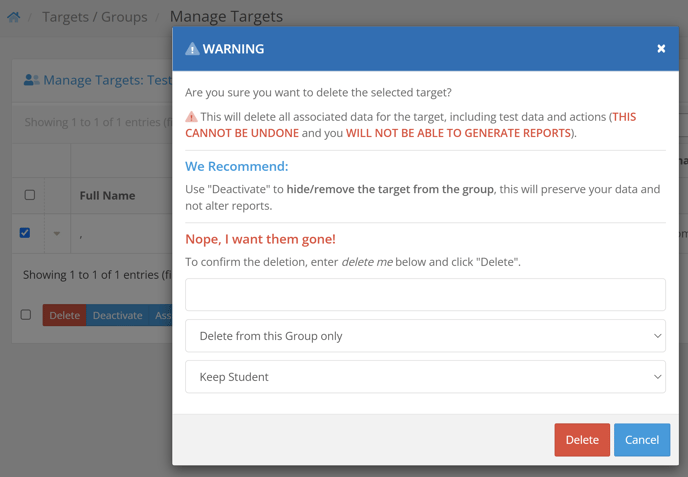
- Delete - This will delete all of the selected targets from the group.
WARNING: If the target only exists inside one group then the target and all its historical data will be deleted
- Deactivate (Activate, if viewing Targets Inactive in Group) - Deactivates the selected targets. Clicking this button brings up a popup that will let you choose to deactivate the targets in the current group or in all groups. Being "inactive in a group" will prevent the target from being included in tests on that group.
- Assign Sub-Group - Assign the selected targets into a sub group
4. Email Column: This column will display the target's email address. On the left side of the column there will be an icon indicating the validity of the email address.
 Indicates a valid email address.
 Indicates an invalid email address. Targets require a valid email address before being tested.
5. Active Status: This drop-down allows you to filter the targets based on if they are active, or inactive in the group
6. Group Select: Use this select drop-down menu to select the group whose targets you wish to view.
7. Last Test: This column displays when the target was last tested. Sorting on this column will arrange targets from most recently tested to oldest tested, or vice versa.
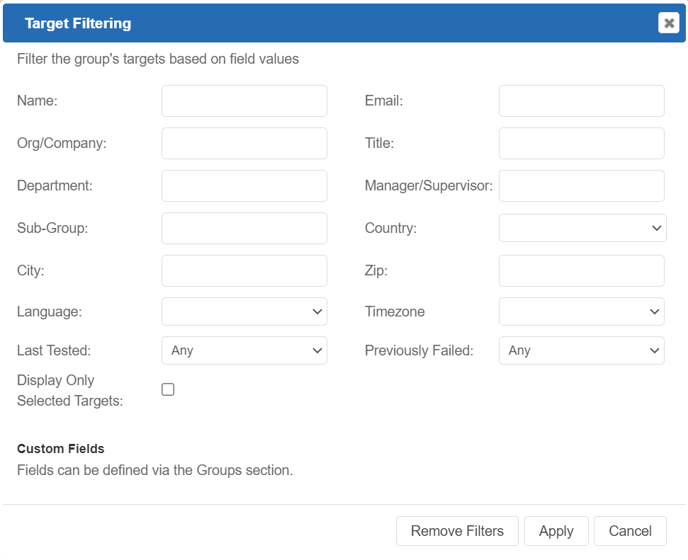
8. Filter Targets: Click this button to open the Target Filtering dialog. Using the filter, you can view targets in the group filtered by name, company, department, sub-group, city, etc. Make sure to click "Apply" to apply the filters. After filtering targets, if you wish to see all targets in the group again, make sure to open the Target Filtering dialog and click "Remove Filters".
9. Add New: Lets you add a single target to the group.
10. Import: Redirects you to the CSV import page, where you can upload a CSV file of targets into the group.
11. Actions This column will display the active/inactive status of the target, and contains action buttons used to make additional actions on the targets. ![]() will be displayed if the target is active,
will be displayed if the target is active, ![]() will be displayed if the target is inactive. You can click the icons to toggle the status of the target. There will also be a View button that will take you to the Target Details page.
will be displayed if the target is inactive. You can click the icons to toggle the status of the target. There will also be a View button that will take you to the Target Details page.
12. Actions Drop-down: This drop-down will contain more options for changing the status or viewing the details of a target.
- View: This will redirect you to the target overview page. This page will display results from the last 4 tests in which target participated, a list of tests on the target, actions taken by the target, and course information for the target.
- Generate Report: Loads a report for the target for all of its testing data.
- Download Report: Constructs a .pdf file containing information on a targets test results
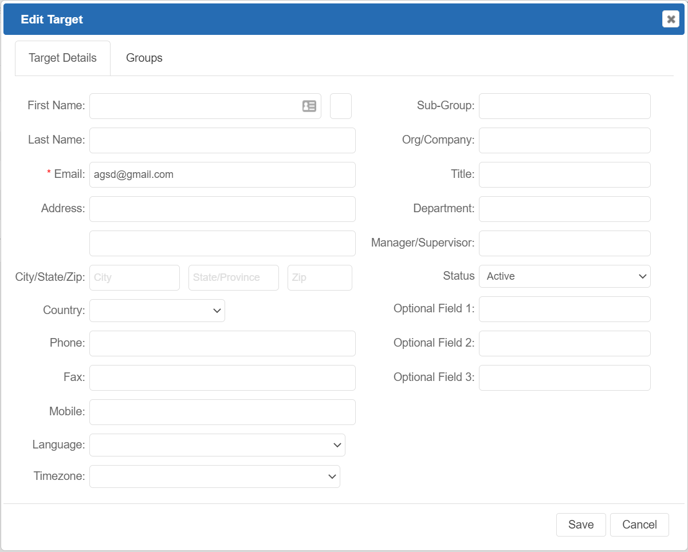
- Edit: This will open the edit target dialog.
- Target Details
- Target Details
-
The target details tab will display and allow you to edit all the fields associated with the target. If you have configured custom fields for the group they will also be displayed.
-
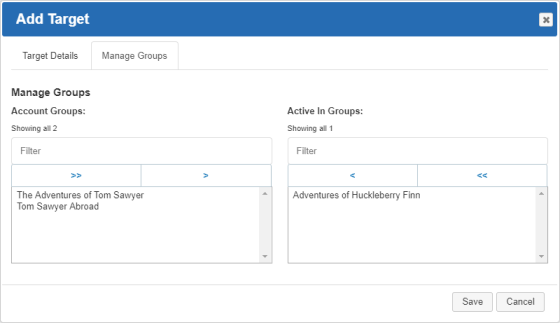
Manage Groups
-
-
Groups in which the target is not a member will appear in the left side, the group in which the target is created is on the right side. To add the target to additional groups, select the group(s) you wish to add the target to and click the ">" button. To add the target to all groups, click the ">>" button. Similarly, you can remove a target from groups by selecting group(s) the target is in on the right and clicking the "<" button.
Click "Save" to save the target's information and groups.
-
- Deactivate (Hide/Remove): Deactivates the target in the group. Inactive targets will not be included in tests and cannot be enrolled into courses.
- Delete: Remove the target from the group. If the target is not in any other groups, the target will be deleted from the system. You also have the option to delete any student with the same email address as the target by choosing the "Delete Student and their Enrollments" in the second drop-down. If you leave the second drop-down as "Keep Student", then the student associated with the email address(es) you are deleting (if any such students exist) will be kept in the system.