This is how you explore the target detail information.
Target Details
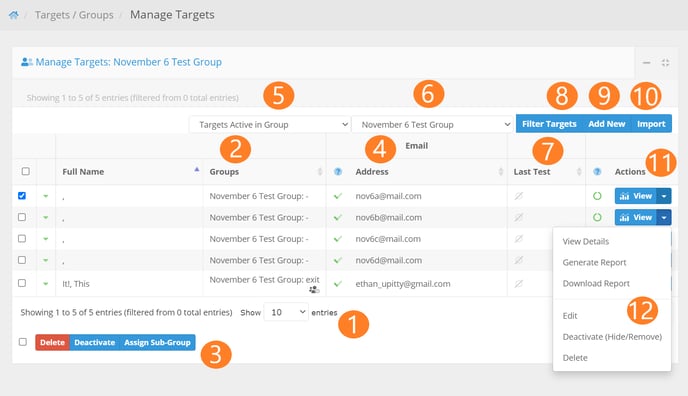
You can get to the Group Details page by going to Targets/Groups > Manage Targets and clicking on the "View" button.
1. Emails Overview
The top of the Target Details page shows the number, for that target, of emails delivered and opened, as well as the number of phishing emails for which the target has clicked links, performed failure actions on the landing pages, completed training, and reported the phishing emails. These numbers are for all tests on that target.
2. Summary Data and IP Map
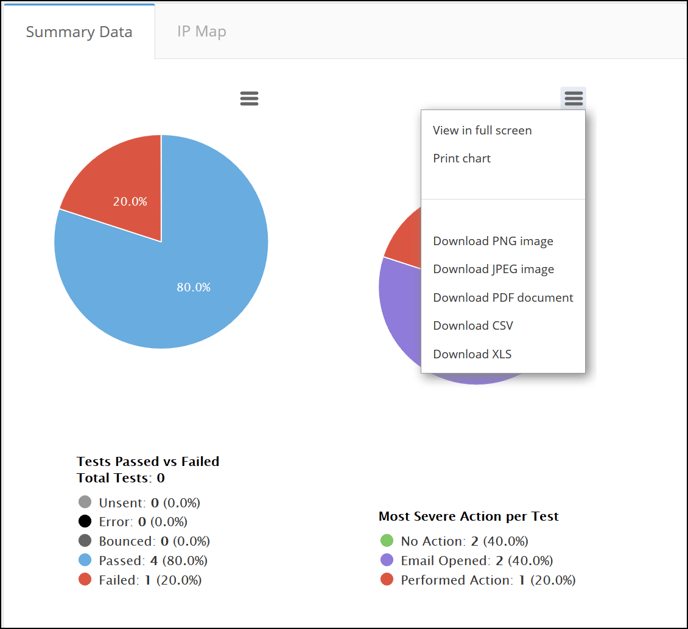
The Summary Data section provides two charts: one that shows the target's pass/fail percentage and another that shows a breakdown by actions for all tests. You can view these charts in full screen, print the charts, or download or open as PNG, JPEG, PDG, CSV, or XLS.
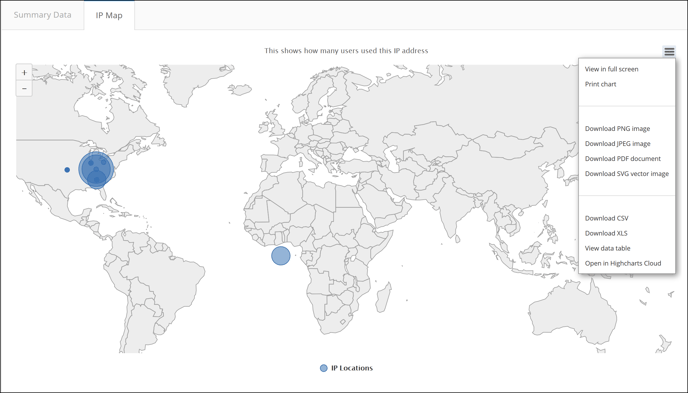
The IP Map is a map of the IP addresses that are associated with actions performed by that target. You may view the map in full screen, print the map, download as PNG, JPEG, PDF, SVG, CSV, or XLS files. You can also view a data table of the map. There is an option to open the map in Highcharts Cloud.
3. Target Details
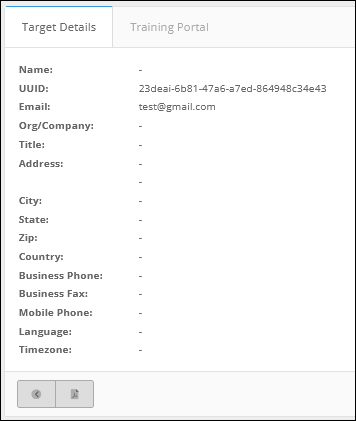
This section provides detailed information about the target - its name, UUID (a unique identifier for that target), email, organization/company, title, address, city, state, zip, country, business phone, business fax, mobile phone, and groups that this target is in. The back arrow at the bottom of the target details section will take you to the previous page. The Generate Report button will generate a report on that target.
4. Training Portal
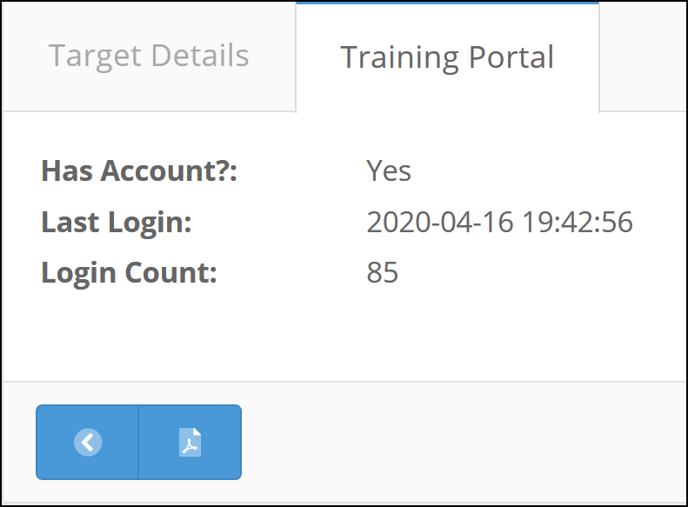
The Training Portal section shows you if the target has a training account, when the target last logged into the school portal, and the total number of times the target has logged into the school portal. There is a back arrow that redirects back as well as a Report Generator button which will generate a report on the target.
5. Groups
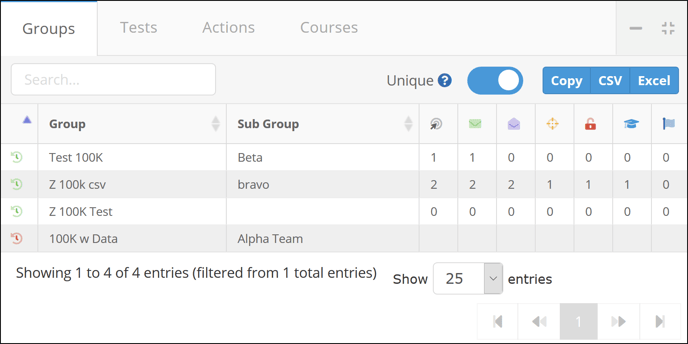
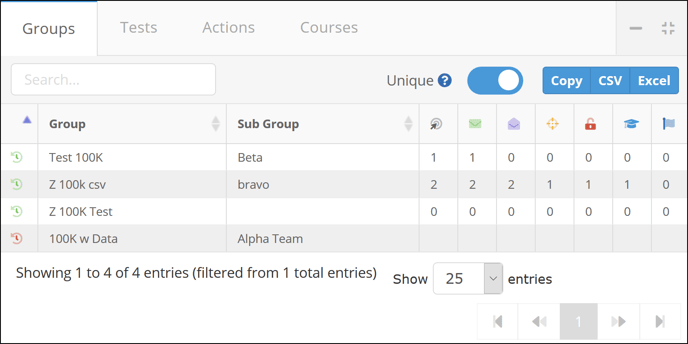
The Groups section show you what groups and sub groups the target is a member of, whether the metrics on that target within the group are current (and when they were last updated), and data about tests that the target was involved in within each group (emails scheduled, delivered, opened, etc. by the target). You can make the data unique (i.e. each action performed against an email only counts once). You may copy the data to your clipboard. You can also download/open it as a CSV or Excel file.
7. Actions
The Actions tab shows a breakdown by action for the test. It shows the email associated with the action, the date/time of the action, the action type (Email Opened, Reported, etc.), the IP address associated with the action, a breakdown of user-agent information, any filters applied to the action, AHD fingerprints, and current status. You can also mass verify actions from this tab.

By default, only actions that are Verified (or simply counted for older tests) will show. You can view Suspicious, Filtered, or All actions by using the select box at the top of the tab. Additionally, you can choose to show or hide various columns by using the "Column Visibility" dropdown at the top of the tab.
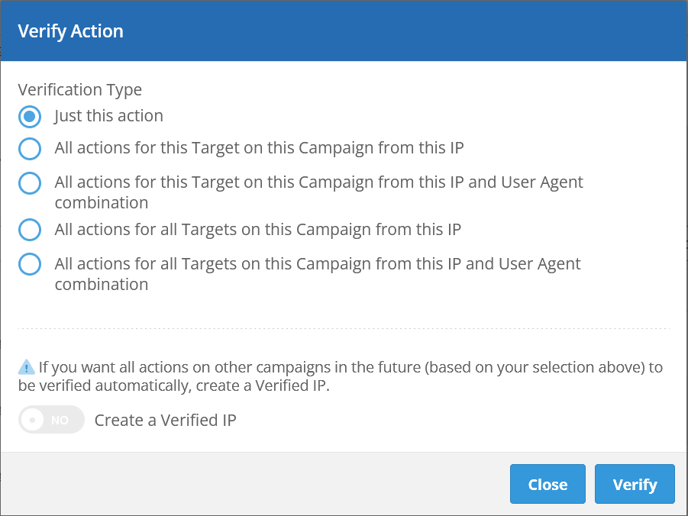
You can manually verify/filter actions by using the buttons in the Status column or the links in the dropdown menu. A modal will open that will allow you to select additional actions based on matching Campaign/IP/User-Agent combinations. Additionally, you can choose to create a corresponding IP Filter or Verified IP based on the same conditions. From the dropdown menu, you can also choose to delete an action. WARNING: Deleting an action cannot be undone!
To get a deeper understanding of how AHD works, take a look at the article here Advanced Human Detection (AHD).
8. Courses
The Courses section shows you the target's progress on the different courses he/she has been enrolled in. You can copy the data to your clipboard, or download/open it as Excel, CSV, or PDF file. You may also print the data.
