Manage Accounts
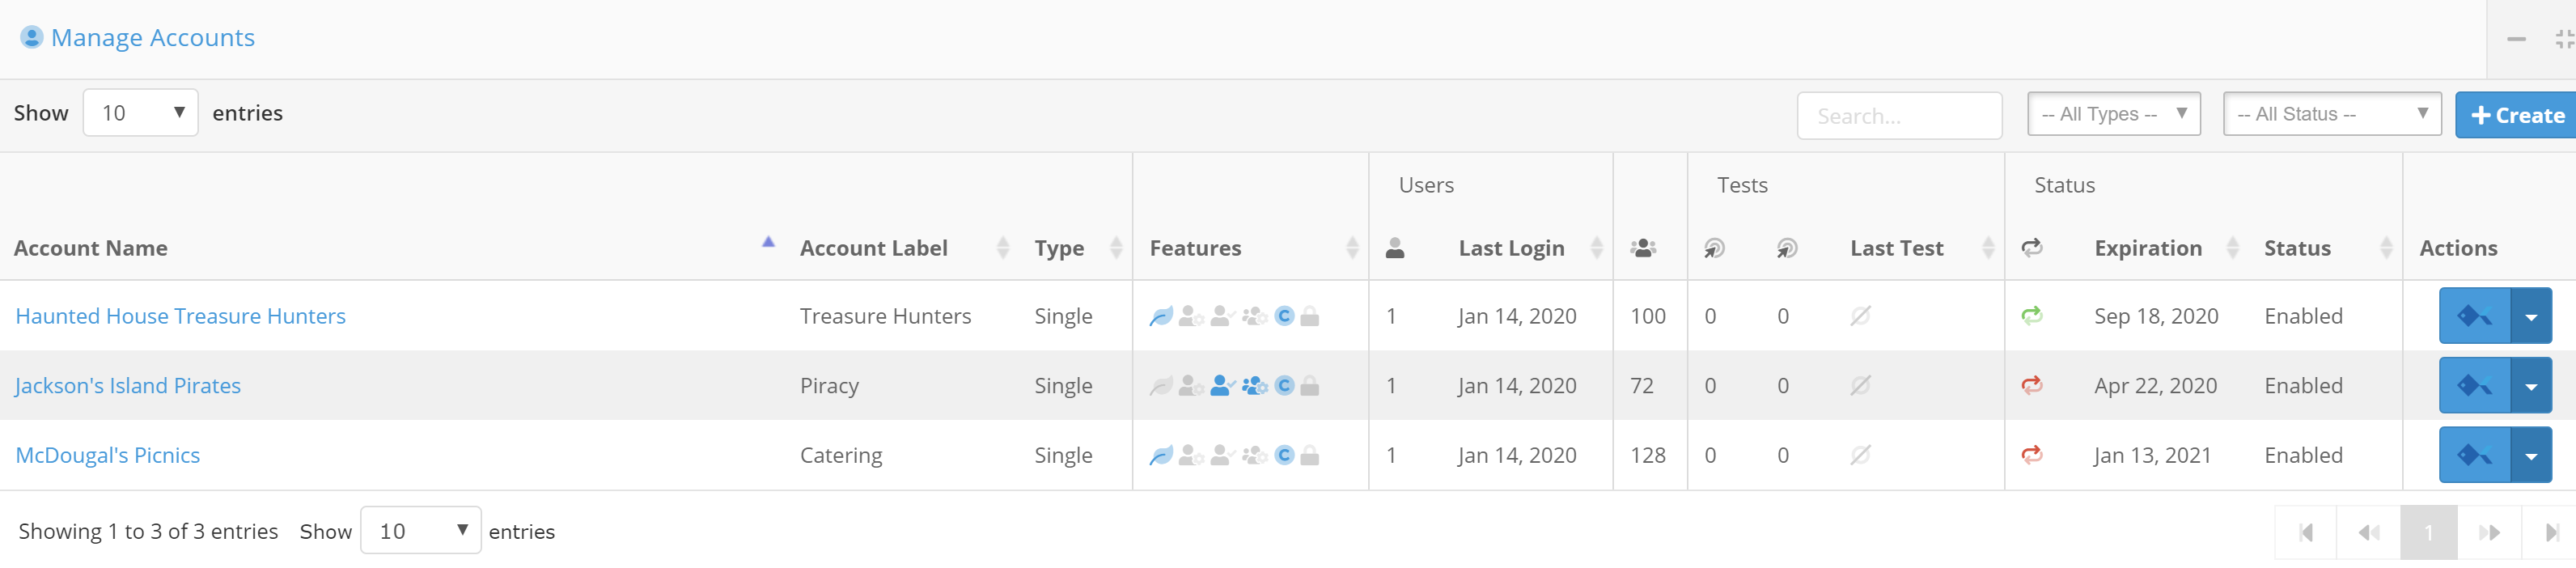
Account Name
If you click on the account name, you will be taken to the Edit Account Page. Please see this article for information regarding editing account features/details/billing address.
Account Label
This is simply an account nickname.
Type
There are three types of accounts: trial, single, and multi.
- Trial accounts can hold a fixed number of seats (5, as of 1/14/2020) and are free.
- Single accounts are associated with a single company. These are purchased on a per-target basis.
- Multi accounts are associated with multiple companies and are will be purchased on a per-email basis.
Please do not establish a multi-account under your reseller account without discussing with your Account Manager first. This can cause issues in billing and information transfer from one account to the other!
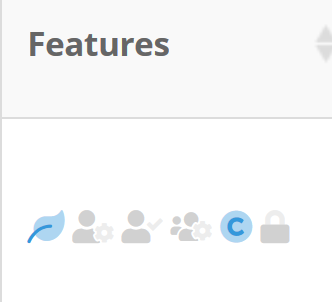
Features
The Features column shows an overview of the Account Features. Each icon represents what some feature is set to (if it is blue, that means the feature is turned on; if it is grey, then that feature is not enabled). Hovering over an icon will reveal text that explains what feature it represents. Please see this article for an explanation of what each feature means.
Users
This column has two components: the number of system users and the last time a user logged in to the account.
Seats/Target Emails

This column, circled in the image above, shows how many seats come with an account. (This is the number of purchased seats - not the number of currently available seats.)
Tests
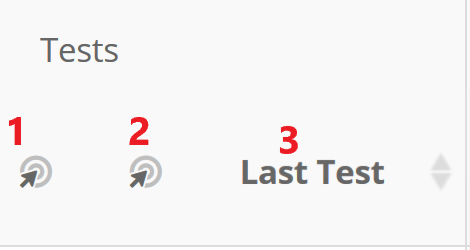
There are three icons/sections in the Tests column:
- Total tests (total number of tests performed on the account).
- Tests in the last 6 months.
- Date of the last test.
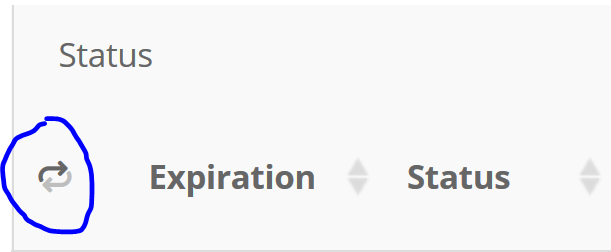
Status
There are three icons/sections in the Status column:
- Status of Auto-Renew (circled in the image below). Auto-Renew has two possible states: on or off.
- The expiration date of the account.
- Status (if the account is enabled or disabled).
Actions
The last column is the Actions column. Here you can view the accounts you have purchased. You can see details such as the account type, how many targets are available to you, features, the expiration, etc.
Jump into Account
Clicking the Portal logo (the little fish symbol under Actions) logs you into the respective sub-account and redirects you to the portal of that account (alternatively, you could click on the drop-down beside the fish and select "Jump into Account"). Once in the account, you can perform any action or view any data associated with that account. To return to your reseller account, click "Back to Admin" in the portal sidebar of the sub-account.

Another way to jump into a sub-account is by clicking on the "Jump Into Account" button located under the Reseller tab.
Edit Account
To edit an account, click on the account's name on the Manage Accounts page, or click "Edit Account" in the Actions drop-down icon. From this page, you can view the account type and edit the account details.
Extend Trial
This option allows you to extend the account's trial period.
Add Domain
This option allows you to add a domain to the account. If there is 1 domain on the account, the company will only be able to phish their primary domain. If you allow multiple domains, the company can add additional domains. See: How to Manage Target Domains
Edit Account Features
Clicking this option will bring up a list of Edit Account controls that are described in this article.
Edit Subscriptions
This option allows you to change the edit the expiration date or delete the subscriptions of the account.