You can connect to a mail server via SMTP in order to send Hook system emails or phishing emails from your own mail server.
Below are the sections you can navigate to:
To reach the Mail Settings page, navigate to Administration > Settings > Mail Settings.
General
The General tab on the Mail Settings page shows an overview of the system email addresses, account manager, and saved system email and phishing email settings including the From Name for school (Testing Center) and PhishingBox emails system emails.
The System Email Addresses drop-down is the From and Reply-To address for all system emails. To use a custom System Email Address, you should also set up a custom SMTP connection as well (deliverability can be impacted if you are using a custom email address without an SMTP server). For reseller accounts, the parent account's selection will be displayed as the default selected option in sub-accounts.
You can send yourself a test system/phishing email by clicking the Send Test Email button.
Custom System Email From - This field specifies the email address from which system emails will be sent.
Custom System Email Reply-To - This field specifies the email address in which will receive replies to system emails.
Custom Email Header - This is the email header added to phishing emails to help them get past email security and replaces the default X-PHISHTEST. The safelisting settings in your email client will need to be adjusted to accept your settings.
Custom Email Header Value - This is the value for the custom email header added to phishing emails to help them get past email security. The safelisting settings in your email client will need to be adjusted to accept your settings.
Add DKIM to Campaign Emails? - If turned on, then all campaign emails (both phishing and training, as well as Preview & Test emails), will have DKIM added if the domain has DKIM correctly configured. (DKIM [domain keys identified mail] helps with email deliverability.) To check if a domain has DKIM correctly configured, go to Templates > Template Domains. If, in the errors/warnings column you see a warning about the domain not having DKIM configured correctly, then any emails that use that domain can still be sent, however, they will not be DKIM authenticated.
NOTE: The Add DKIM to Campaign Emails setting is on by default.
Saved System Email Settings - The system email settings that have been saved on the account. You can check deliverability of these types of emails by clicking on the Send Test Email button. (The settings have been obfuscated in the picture above.)
Saved Phishing Email Settings - The phishing email settings that have been saved on the account. You can check deliverability of these types of emails by clicking on the Send Test Email button.
Custom SMTP for System Emails - This setting lets you configure your own SMTP server for sending email. Clicking the "Custom SMTP for System Emails" switch will reveal the outgoing mail server configuration panel, where you can configure the SMTP server from which system emails will come. Input the configuration specified by your mail server in order to allow PhishingBox to connect to the server via SMTP. This will allow PhishingBox to send mail via your mail server.
NOTE 1: If you are attempting to connect to a mailbox in Microsoft, the account must be a licensed Microsoft user.
NOTE 2: Some security configurations may block PhishingBox from connecting to your mail servers. PhishingBox admin portal servers (US -54.80.160.189, EU -54.93.55.235) must have access to the SMTP port. Consult with your software or hardware vendor(s) for troubleshooting assistance.
Direct Delivery
Direct Delivery allows you to place messages directly into a Microsoft user's inbox (using Microsoft Graph), without the need of sending an email from a mail server. This allows you to bypass any delivery issues when conducting simulated phishing tests.
The recipient email addresses must exist within the Azure tenant where Direct Delivery is enabled, otherwise they will not receive the mail. When a PhishingBox account has direct delivery enabled, it will automatically attempt to send simulated phishing and training emails to targets in the account using Direct Delivery.
NOTE: It's possible to enable Direct Delivery for specific group(s) instead of an entire account. See the Direct Delivery Section of our Create / Edit Group article. This would be best for partners or companies who have multiple Microsoft instances in one account.
To enable Direct Delivery, click the "Enable Direct Delivery" button. The following permissions will be requested:
- Read all users' full profiles
- Read mail in all mailboxes
- Read and write mail in all mailboxes
- Sign in and read user profile
Click the "Accept" button to grant these permissions. To disable Direct Delivery, click the "Disable Direct Delivery" button:
Security Inboxes
Security Inboxes on the other hand, are used to track reported phishing emails - so this is for a different use than the Reply Inbox. To put it simply: Security inboxes are an alternative way to report phishing emails; this is not a failing action.
The Security Inboxes tab shows the email accounts that you've added as Inbox connections. The primary goal of these inboxes is for logging reported actions. If a target forwards a simulated phishing email to an inbox listed on your Security Inboxes page, a "Reported" action will show up on the test for the target. If your account has the Inbox feature, then these mail accounts will show up on your Inbox page in Portal.
You can add two types of email accounts: Microsoft Active Directory and IMAP.
You can view Active Directory connections or IMAP connections by choosing one from the dropdown beside the Show Deleted checkbox. If you select Show Deleted, then connections that have been deleted will be displayed (you can reenable deleted connections). The dropdown under actions allows you to edit, turn off/on, delete, or reauthorize (Active Directory only) connections.
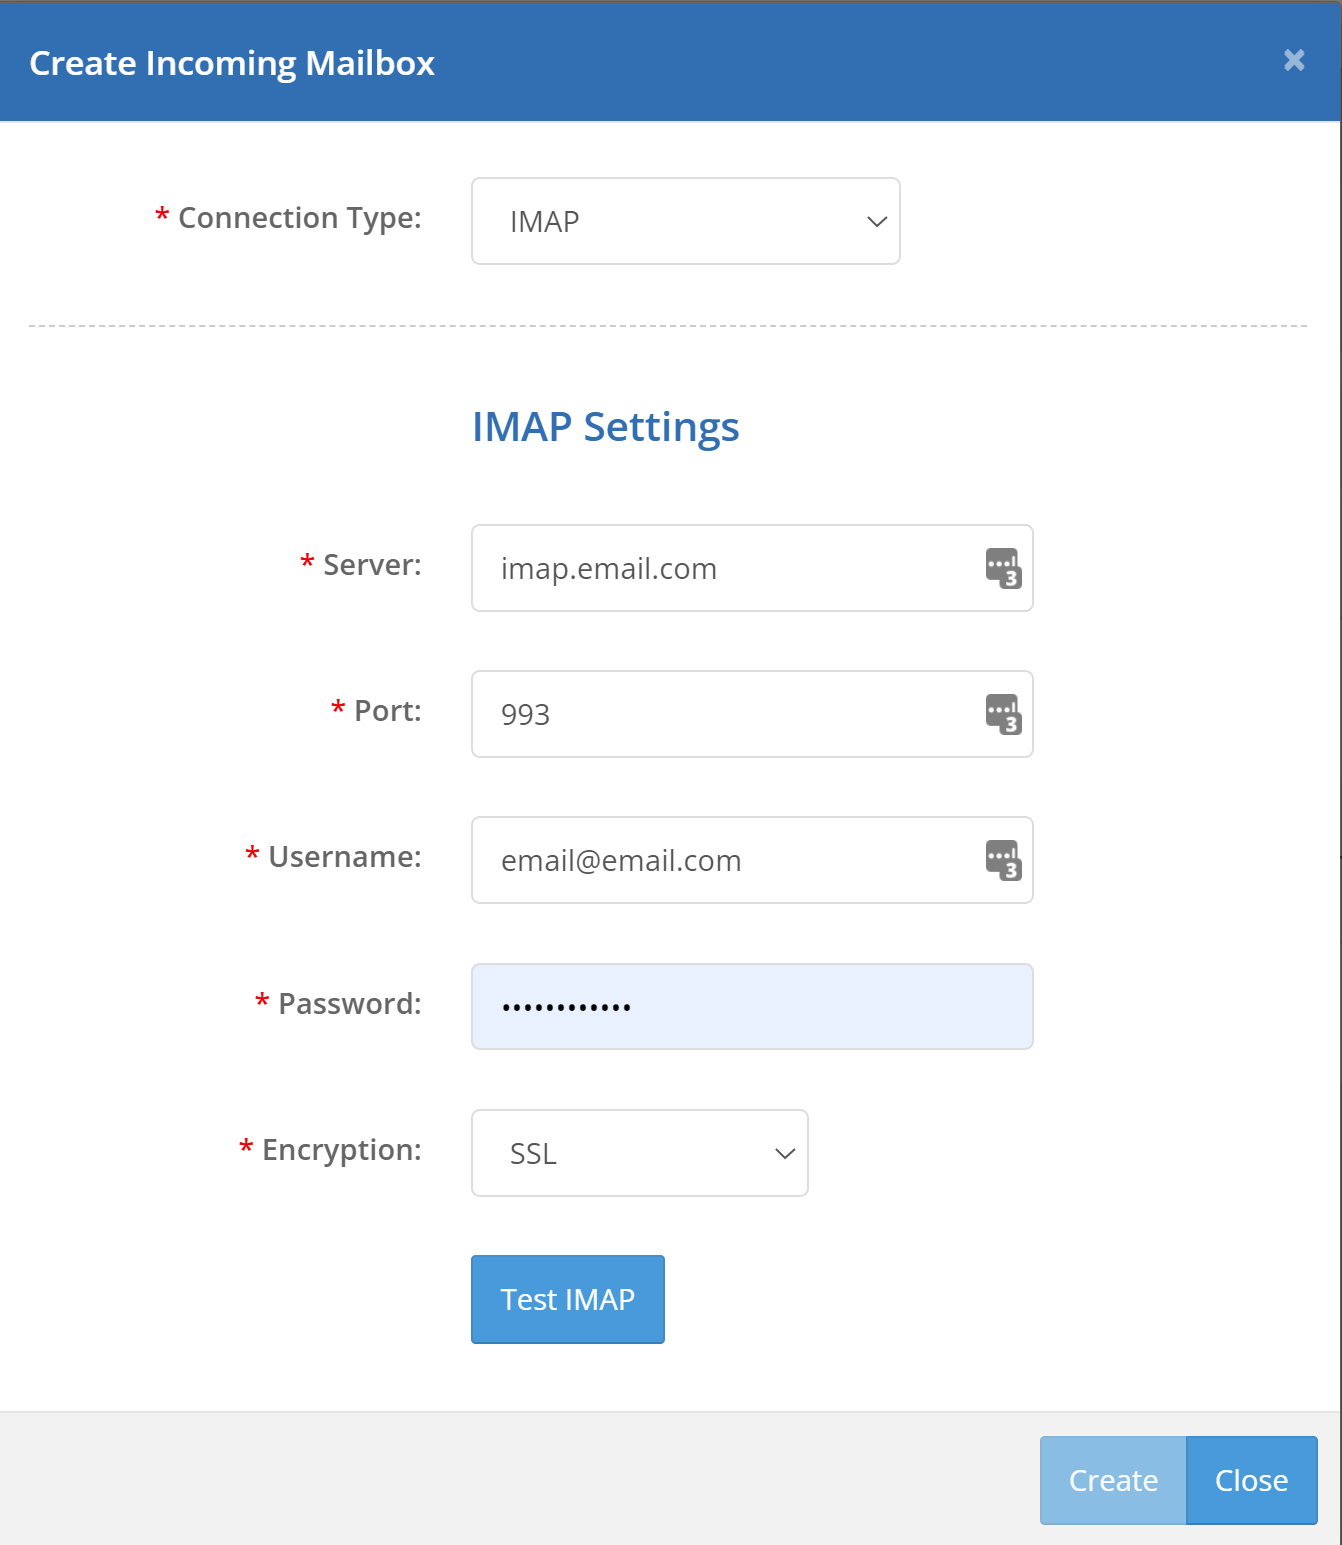
To connect an IMAP account, you'll need the server, port, username, password, and encryption type (SSL or TLS). Once you've entered this information, click the "Test IMAP" button. If PhishingBox is able to successfully connect to the IMAP account, you'll be able to click the Create button. This email account will then appear on your list of Inboxes. It will also show up in the dropdown when you navigate to the Inbox page. The account will be scanned once an hour
Gmail users - If you are using a Gmail account, and you have trouble connecting to IMAP, then you may need to follow these steps:
-
Login to your Gmail account and enable IMAP (see this article for instructions).
-
Allow access to less secure apps by following this link: https://www.google.com/settings/security/lesssecureapps
-
Go tohttps://accounts.google.com/b/0/DisplayUnlockCaptchaand enable access.
Source: Stackoverflow - https://stackoverflow.com/questions/24525284/access-emails-using-imap/32239136#32239136
- NOTE: Some security configurations may block PhishingBox from connecting to your mail servers. Consult with your software or hardware vendors for help with troubleshooting.
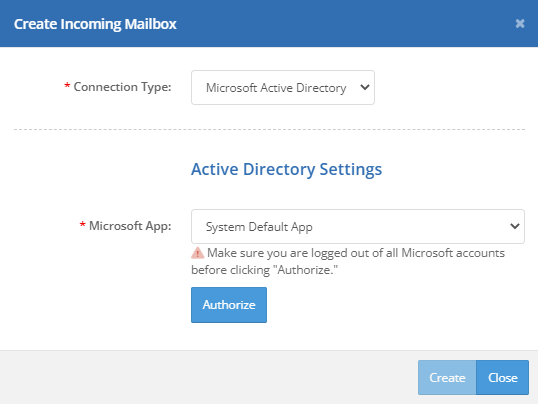
To connect a Microsoft Active Directory account, set the connection type to Microsoft Active Directory, choose a Microsoft App, and click the Authorize button.
The Azure Active Directory App require two delegated permissions into the connected mailbox.
- Mail.ReadWrite
- User.Read
If desired, you can create your own custom Azure Active Directory Application with the above permissions to use with Inbox. This process is described below in the Custom Active Directory App section.
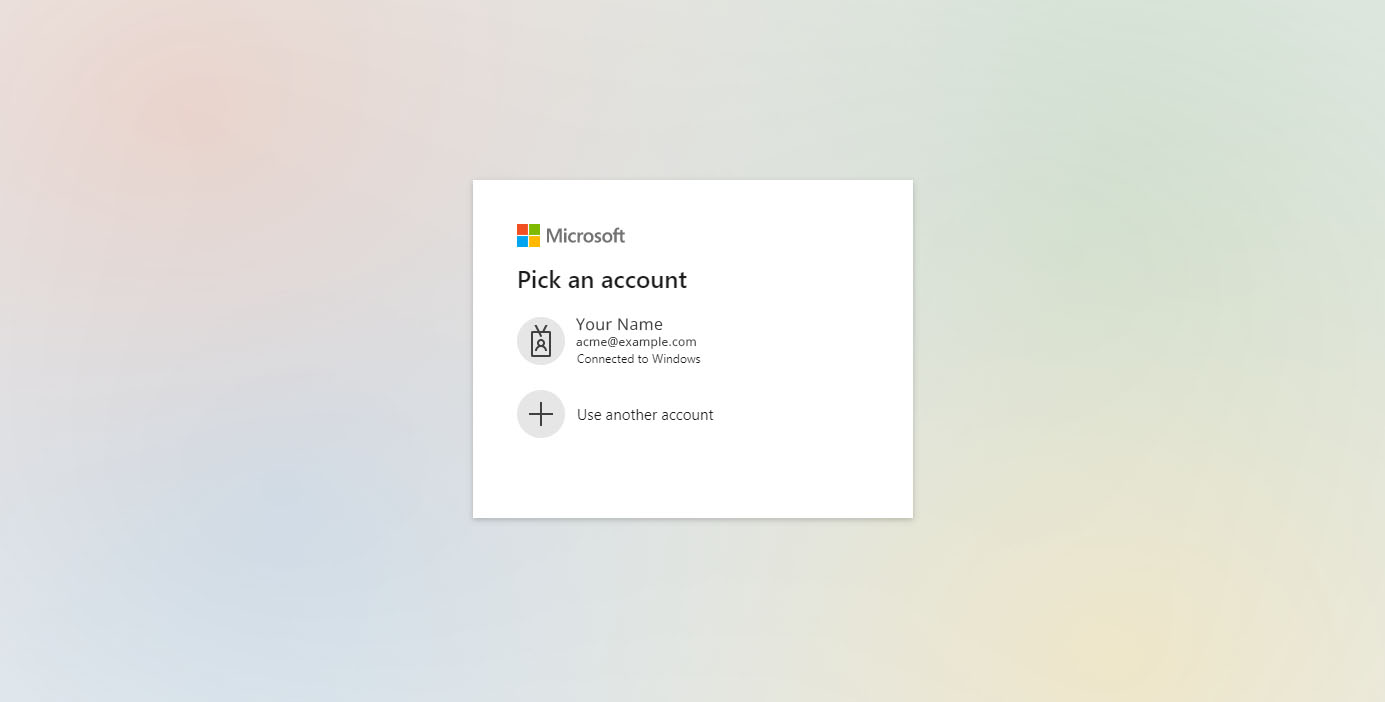
You'll then be taken to a Microsoft page where you will select the email account you want to connect. Since both the required permissions are delegated, they do not require Administrator consent. If successful, you will be returned to PhishingBox and get a success message.
Reply Inboxes
The Reply Inboxes page shows inboxes set up on your account that will listen for replies to phishing emails. If a target replies to a simulated phishing email and the reply goes to an inbox listed on the Reply Inboxes page, then a "Replied" action will be logged on the test.
To put it simply: Reply Inboxes are a way to track replies to an inbox that Hook doesn't own; it is a failing action.- NOTE: Custom reply inboxes are not required to log reply-to failures. As long as a reply to a simulated phishing email goes to an email address with a domain that belongs to Portal, the reply action will be logged.
Last Scan Started - The time that the scan began for the inbox. Once an hour, Portal will read emails in the inbox, searching for simulated phishing emails from targets.
Last Scan Finished - The time that a scan of the inbox completed.
Errors - Any error tied to logging into the inbox that Portal encountered.
Last Tested - The time the inbox connection was last tested.
Only IMAP inboxes can be added on the Reply Inboxes page. To add an inbox, click the Create button, enter the server, port, username, password, and encryption type and test the connection.
SMTP (Outgoing)
The SMTP (Outgoing) tab allows you to set up SMTP connections from which phishing/training emails can be sent. Once you create an SMTP connection from this tab, you will be able to choose it at the end of campaign setup, as shown in the second screenshot below.
This is how the SMTP connection can be selected at the end of campaign setup to send phishing/training emails.
Custom Active Directory App
Microsoft requires the use of OAuth to connect to an email account and modify messages. In order to add a Microsoft account inbox connection to your list of Inboxes, you must first create an app registration inside your Azure AD admin account. Then, from the Custom Active Directory App tab on the Mail Settings page, you can add the app registration by clicking the Add Custom App button. This displays a modal in which you'll enter the app name, client id, and client secret. The client id and client secret will come from the app registration in Azure. The app name is something you assign to the Active Directory App in PhishingBox for identification purposes.
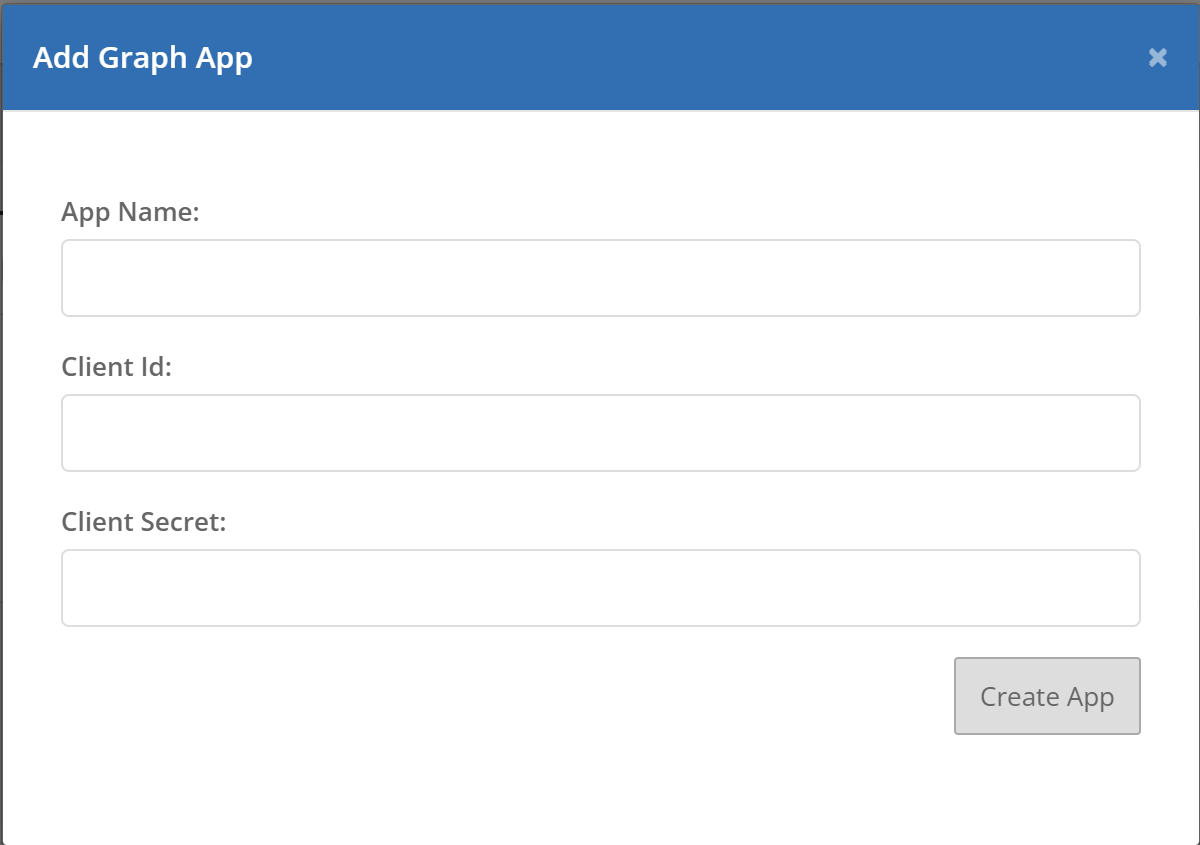
The client id and client secret will come from the app registration you create in Azure AD.

Once you've added an Azure Active Directory App, the app will be available from the Microsoft App dropdown when you add a new Inbox connection.