To get a more in depth understanding of all the settings inside of our campaign wizard, please visit this article.
Step 1: Navigate to Template Library
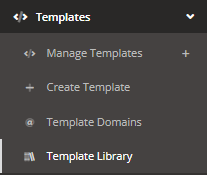
To pick out a template to go out in your campaign, first navigate to the left side of the screen and choose the option Templates. Next, click on the option Template Library.
Step 2: Press Get On The Template You Like
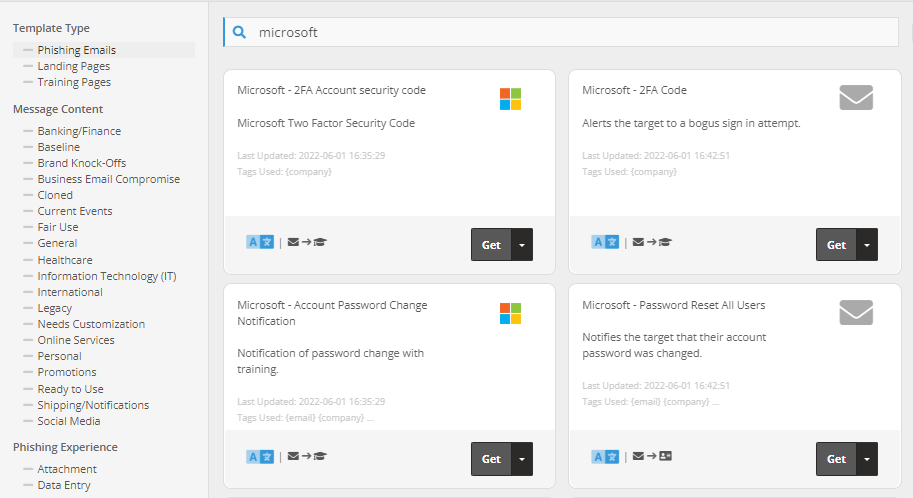
To preview the content within the template, navigate to the downward arrow next to Get and press Preview.
Step 3: Adjust Template to Preferences & Save
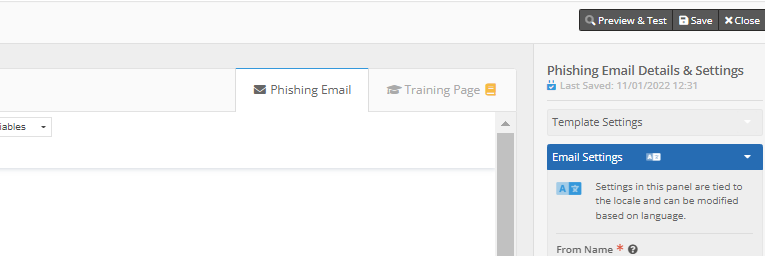
Hook Security phishing templates are all highly adjustable! If you would like to discuss how you can further customize your templates, please reach out to your CSM.
Step 4: Navigate to Create Campaign and Select Phishing Campaign
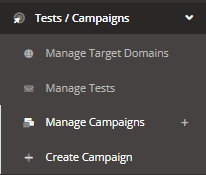
To get to the Campaign Wizard, navigate to the left side of the screen and choose the option Tests/Campaigns. Next, click on the option Create Campaign.
Step 5: Choose Send Settings
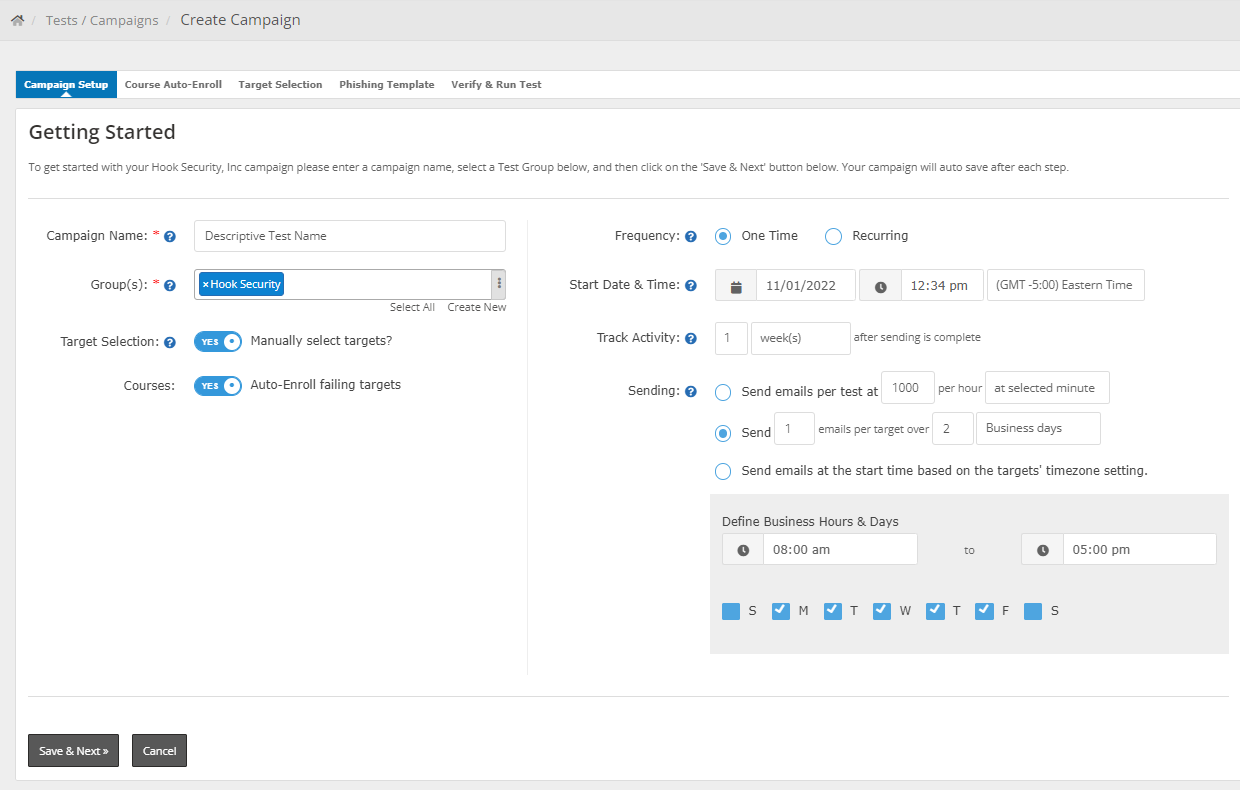
Name your campaign with a simple, descriptive name that will help you keep track of what has been sent to targets and choose the group you would like to send this campaign to. Each Group will be tested separately, and this is reflected in how the emails are scheduled to go out. For example, the above image would send out 1000 emails out at the beginning of the test. If you have two groups, they would both be sent a 1000 emails as the test begins.
Helpful Tip: If you have auto-sync on with your groups, you can set up a recurring campaign to your targets and rest assured that everyone, even new team members, will receive the simulation. Simply ensure you have all the templates ready to role and their domains safelisted. We do not recommend this for teams that use CSVs to upload users.
If you toggle on Target Selection, you will be able to select the targets you would like to send the simulation to as you continue to set up the campaign. If you leave it toggled off, it will be sent to the entire group.
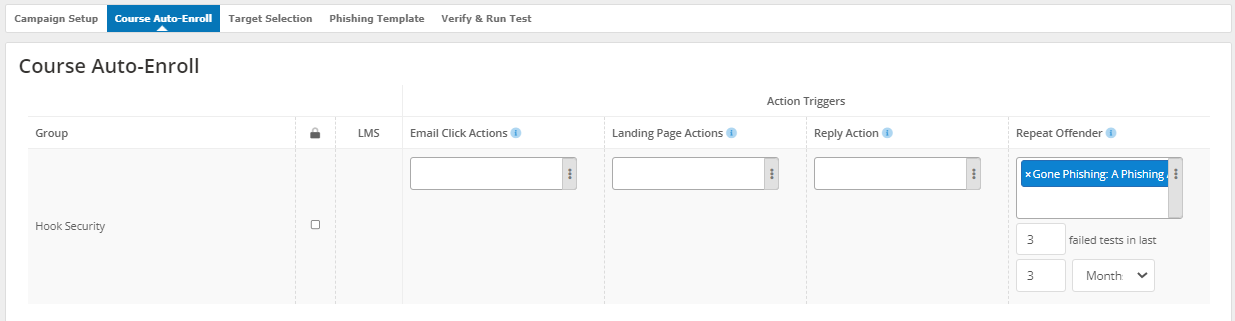
If you have access to courses, Course Auto-Enroll will be an option that you can toggle on. You can choose to enroll failing targets into a course; we typically recommend a phishing specific course like Gone Phishing!
Step 6: Add Phishing Template
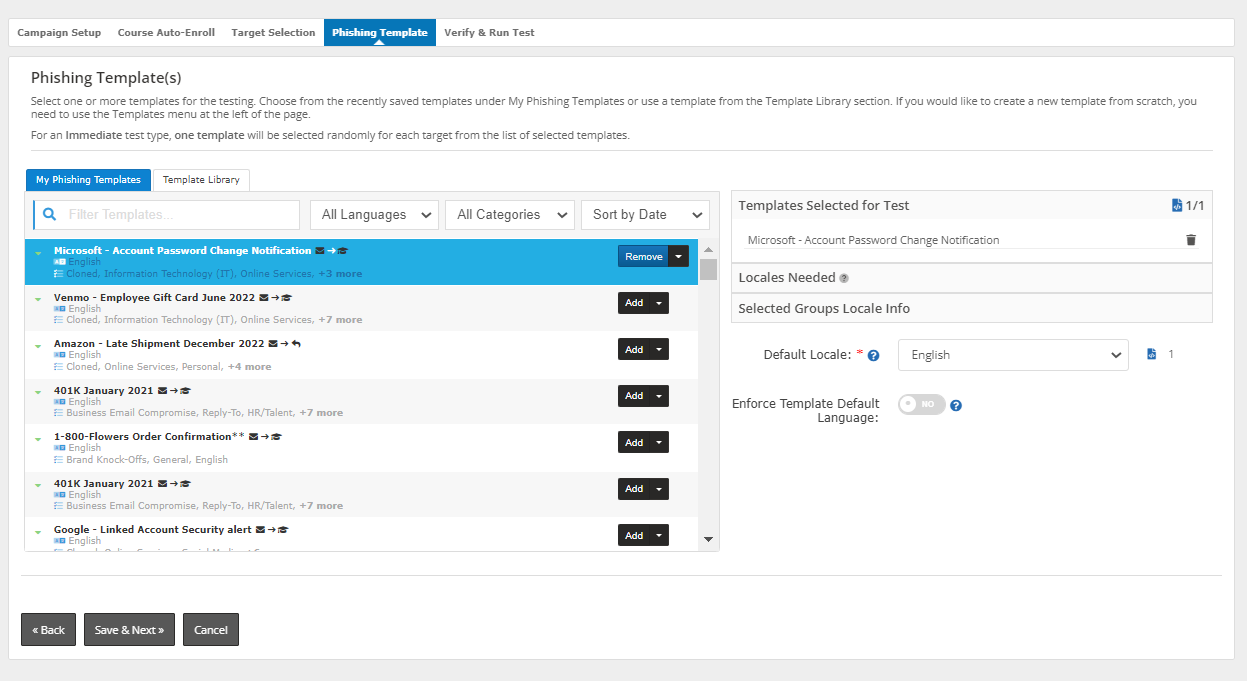
When you reach this tab, you will press add on the template you selected earlier. Be sure you have safelisted the domain associated with the template previous to sending out the simulation!
If you have safelisted multiple domains for multiple simulations, you could add 2 or 3 to be randomly selected to go out to your targets. This is optional if you would like to have your users receive different emails from one another.
Step 7: Verify & Run Test

At this point, all you need to do is ensure your settings are all correct and your domain has been authorized.
When you are certain it’s ready to roll, press Finish and you have officially set up a campaign!