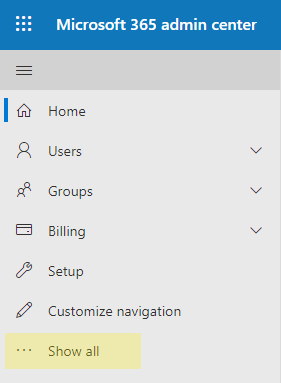
To set up a Connector, navigate to the Office 365 Admin Center.
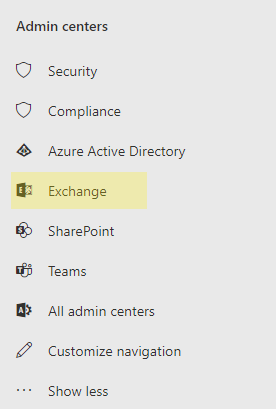
Once in the admin center, click 'Show all' then 'Exchange'.
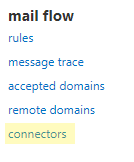
Under the mail flow section, click 'connectors'.
After navigating to connectors, click ![]() to add an additional connector. This will open the New Connector wizard.
to add an additional connector. This will open the New Connector wizard.
In the 'From:' select menu, select 'Partner Organization'.
In the 'To:' select menu, select 'Office 365'.
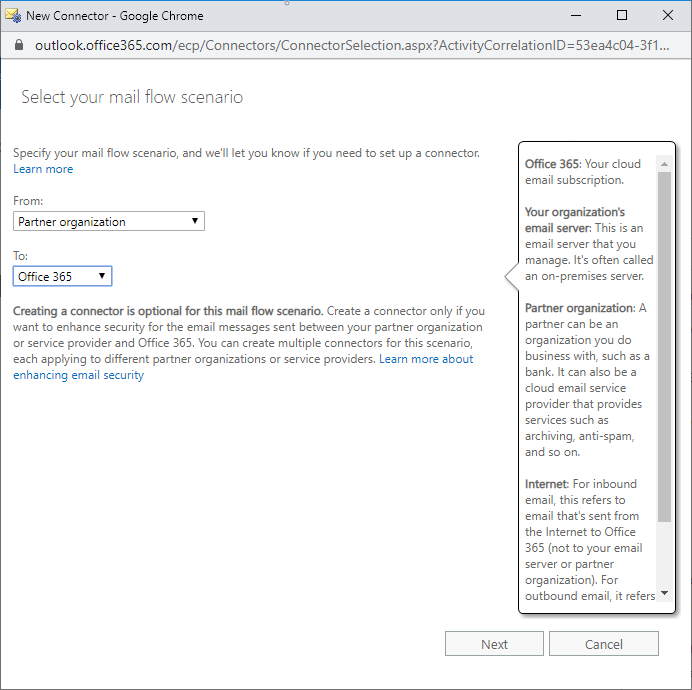
Click 'Next' to navigate to the next step.
In the 'Name' text field, enter a descriptive name for the connector, such as 'HookMail Connector'. Adding a connector description is optional. Make sure the 'Turn it on' checkbox is checked.
Click 'Next' to proceed to the next step.
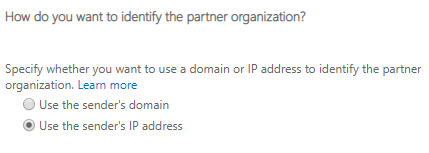
Click the 'Use the sender's IP address' radio button and click 'Next' to navigate to the next step.
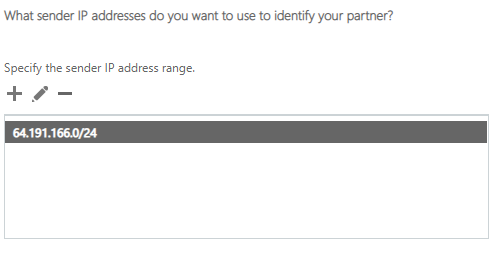
Click ![]() to add a new IP address. In the text field, enter '64.191.166.0/24', then click 'Ok'.
to add a new IP address. In the text field, enter '64.191.166.0/24', then click 'Ok'.
Click 'Next' to proceed to the next step.
Ensure the 'Reject email messages if they aren't sent over TLS' checkbox is checked, then click 'Next' to navigate to the last step.
On the final page, review the connector's settings and click 'Save' to enable the connector.