NOTE: If a user is provided access to the phishing portal via your organization's SSO IDP and does not already have an account in the phishing portal (in Administration>Manage Portal Users), an account will automatically be created with a role of "Admin" when the user accesses the phishing portal via SSO.
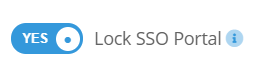
SSO Lock
If enabled, administrators can log in to the portal via SSO only. If the SSO configuration fails and administrators can no longer log in, you will have to contact support in order to disable this feature.
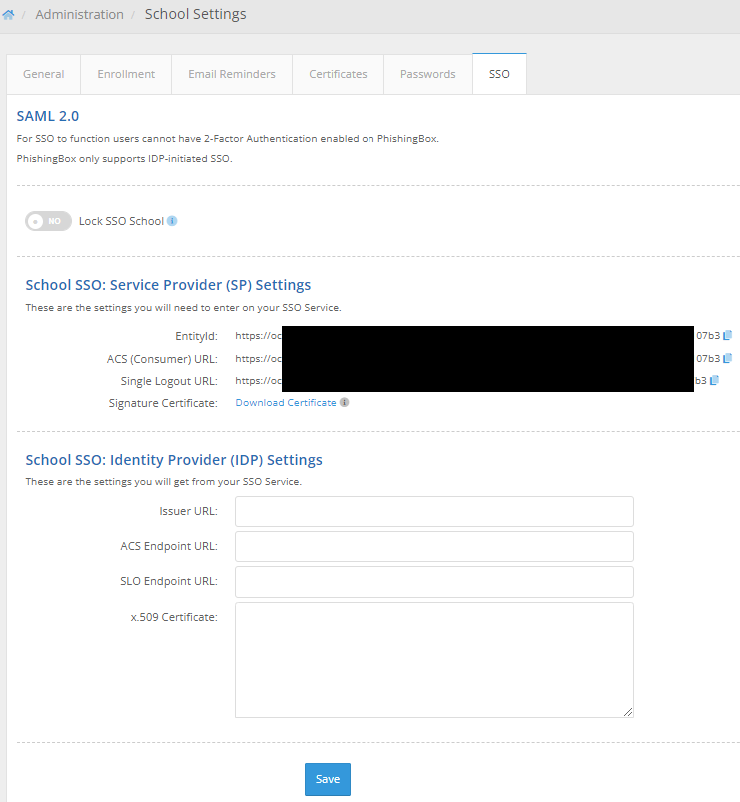
School and Portal SSO
You can set up SSO for School on the School Settings page (Administration > Settings > School Settings) and Portal on the Account Settings page (Administration > Settings > Account Settings). If you wish to set up Okta for both School and Portal logins, you will need to create two separate applications on your IDP (this is due to needing to use different URLs). The top section are Portal/School settings that you will paste into your IDP and the bottom section are settings that you will get from your IDP.
First, log in to Portal and go to Administration > Settings > School Settings (or Account Settings, if setting this app up for Portal logins) and click on the SSO tab.
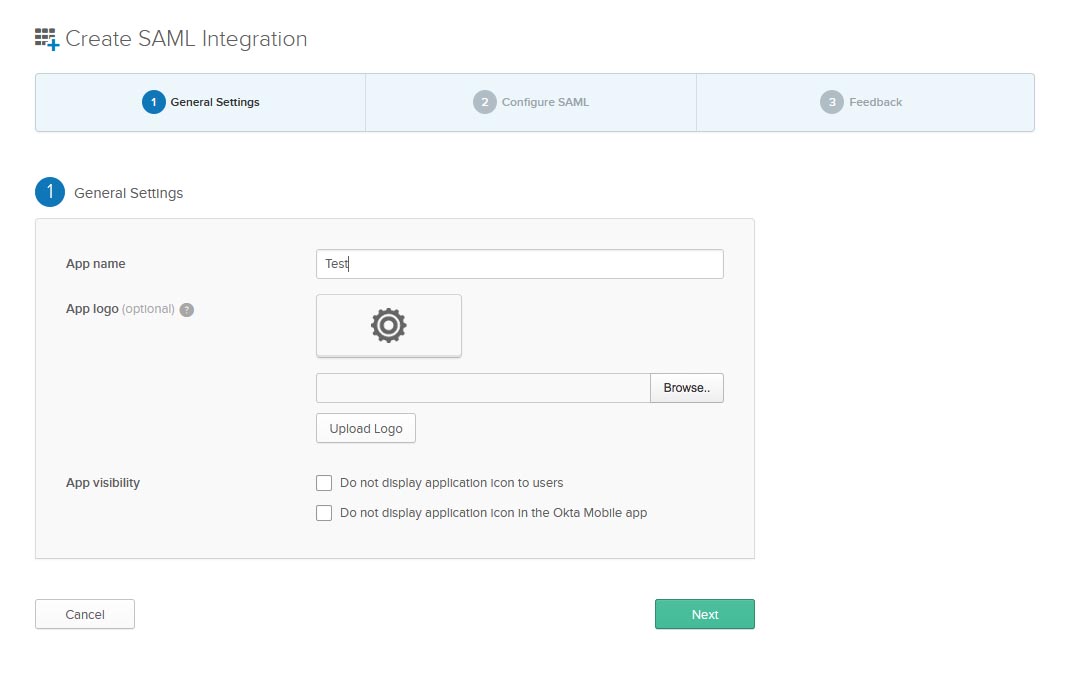
From the Okta Admin portal, go to the Applications tab and click the green "Add Application" button.
Next, click the green "Create New App" button.
- Select "Web" from the Platform dropdown menu.
- Select the SAML 2.0 radio button.
- Click the green "Create" button.
Step 1: General Settings
Give your app a name and upload a logo of your choice. Then click on the green "Next" button.
Step 2: Configure SAML
Portal SP Settings you plugin into your IDP:
- ACS (Consumer) URL -> Single sign on URL
- EntityId -> Audience URI (SP Entity ID)
- Your Whitelabeled URL -> Default Relay (Note: Be sure to add "/index.php" to the end of your whitelabled URL. For example, if your whitelabled URL is "https://yourcompanyschool.testingcenter.net", you'd want to use https://yourcompanyschool.testingcenter.net/index.php as the Default Relay.)
- Select "emailAddress" -> Name ID format
- Select "email" -> Application username
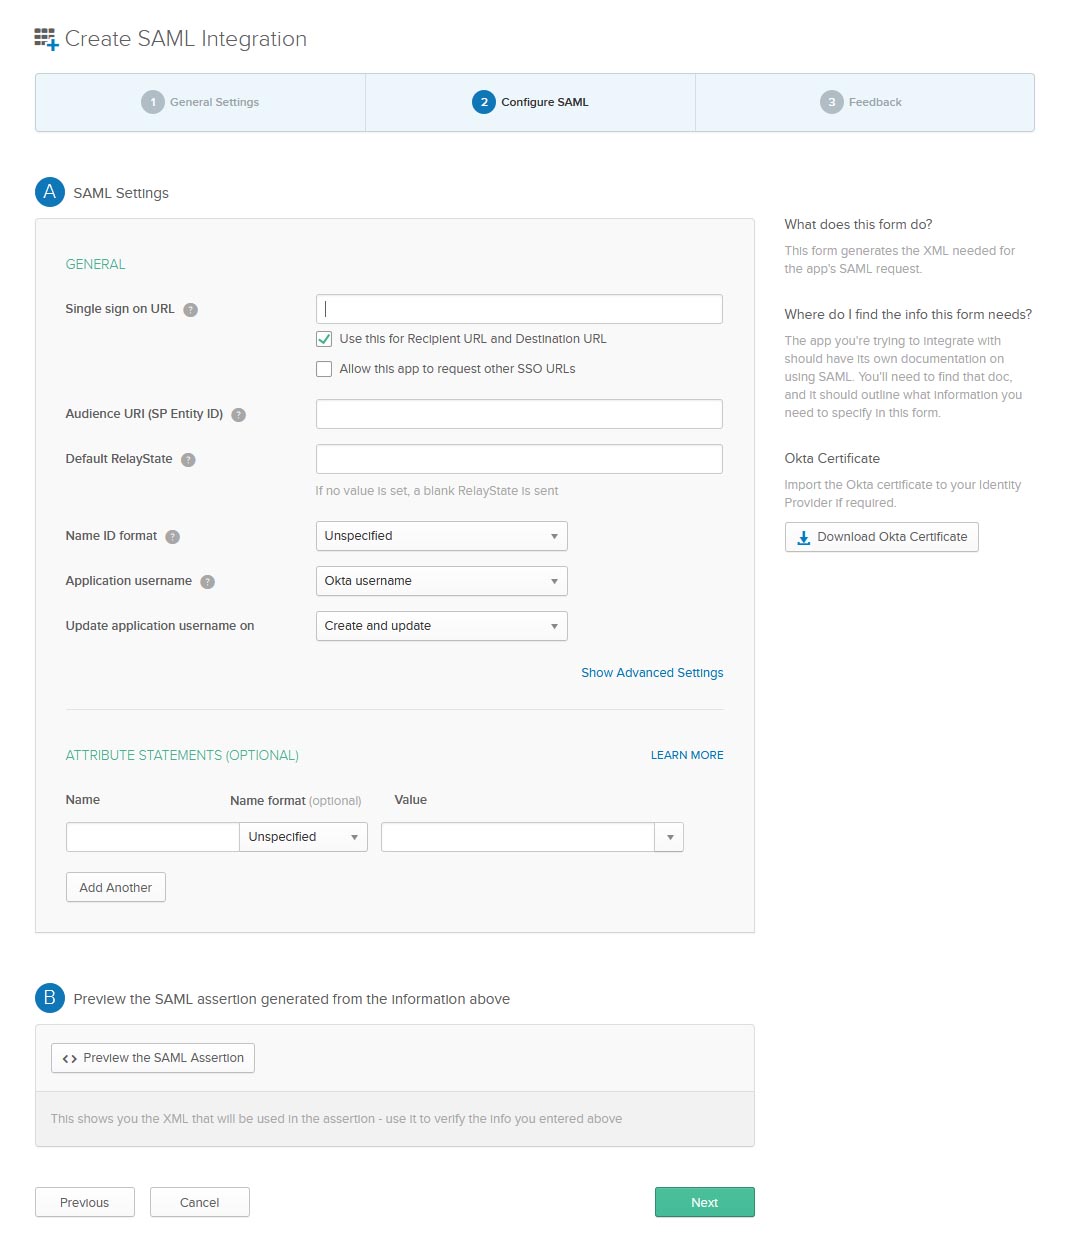
Single Log Out (optional)
If you wish to use Single Logout (SLO) with PhishingBox, click the 'Show Advanced Settings' link in the Okta application's SAML Settings form. This will expose Okta's SLO settings.
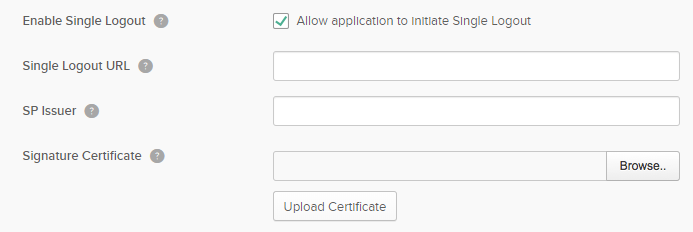
Click the 'Allow application to initiate Single Logout' checkbox. Then, copy the Single Logout URL from PhishingBox and paste it into the Single Logout URL field in the SAML Settings form. The 'SP Issuer' in Okta will be the same as the 'Audience URI (SP Entity ID)', or Entity ID. Download the Signature Certificate from the PhishingBox Okta setup form by clicking the 'Download Certificate' link.
![]()
Upload the certificate to the Okta application in the 'Signature Certificate' field. Be sure to click the 'Upload Certificate' button after you have selected the file. The file will be named 'sp.crt'.
- NOTE: Some browsers may give warnings when downloading .crt files.
- NOTE: Okta only accepts logout requests from service providers. Okta will never send logout requests to service providers. I.e., logging out of PhishingBox will log the user out of Okta, but not vice versa.
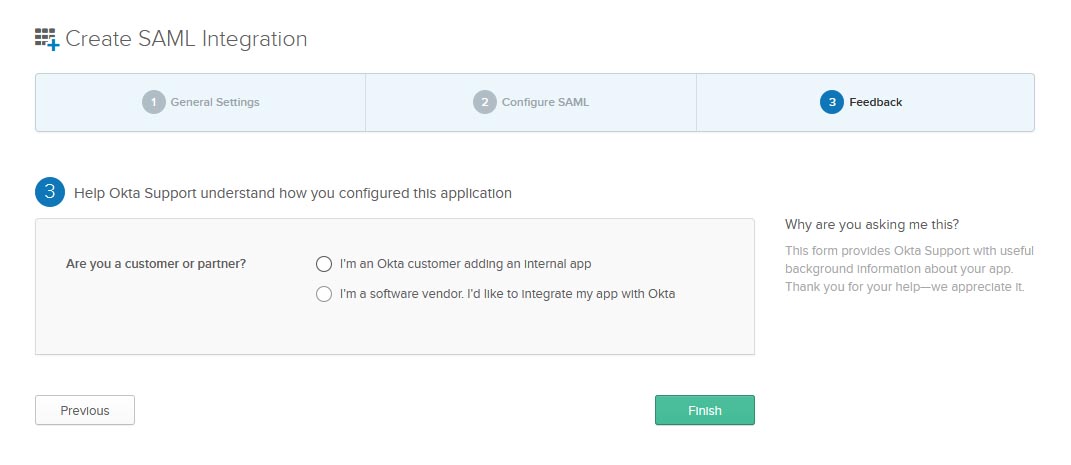
Step 3: Feedback
Select the "I'm an Okta customer adding an internal app" radio option.
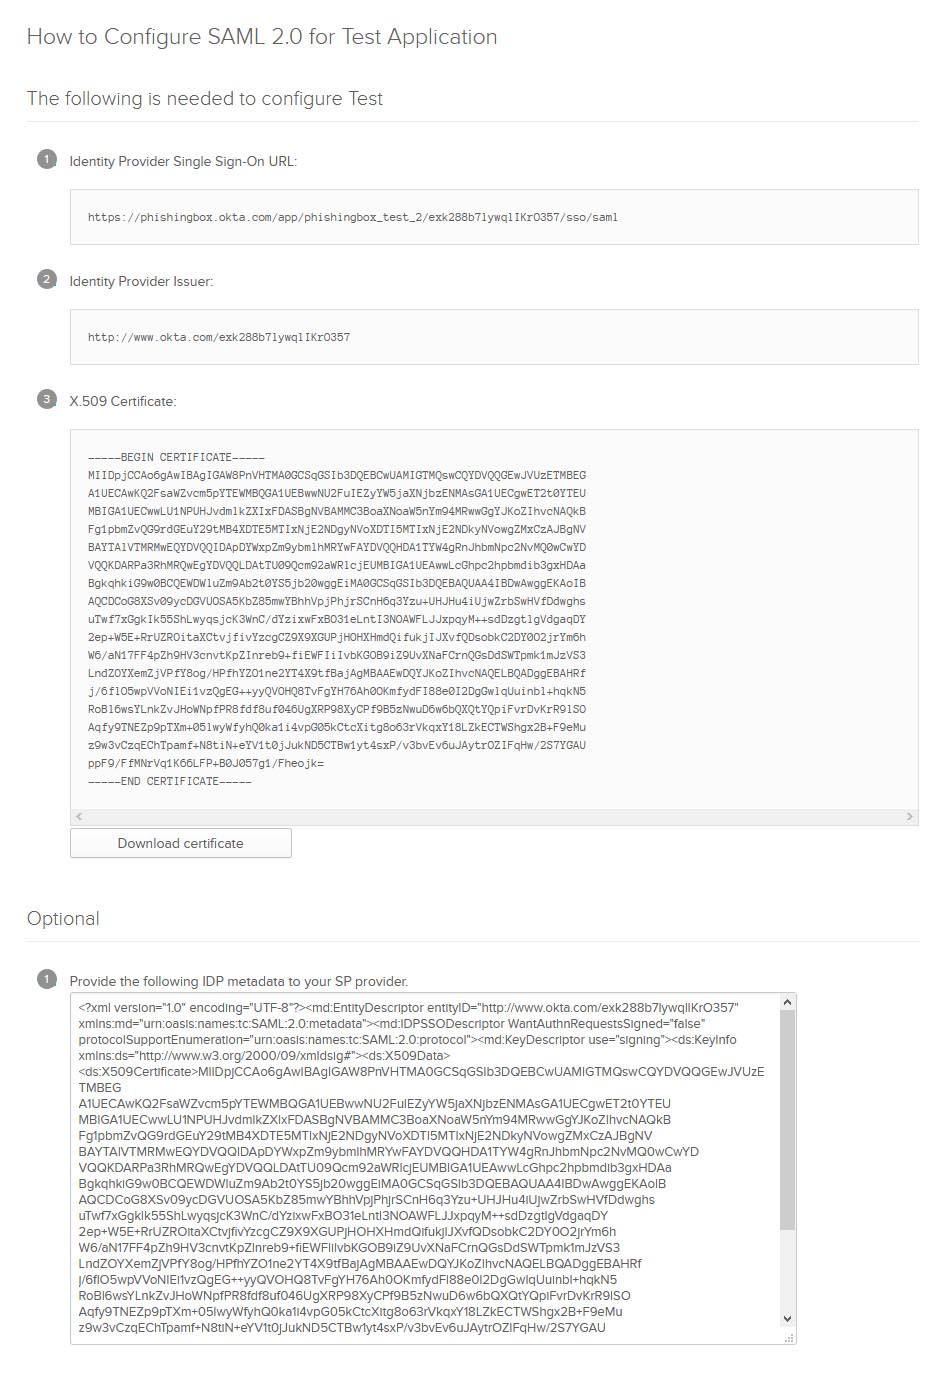
Step 4: Settings for Portal/School
Your IDP settings you plugin into Portal SP:
Click on the "View Setup Instructions" button to get the settings to enter in Portal.
- x.509 Certificate -> x.509 Certificate
- Identity Provider Issuer -> Issuer URL
- Leave the SLO Endpoint URL field blank
- Identity Provider Single Sign-On URL -> ACS Endpoint URL
To navigate to the Portal SSO Settings for Okta, go to Administration > Integration Store and click on the Setup button for Okta.
Note: A sign in URL can be obtained from the users IDP, usually it will be a URL with query parameters.