LDAP configurations vary from organization to organization, so you may have to consult with your organization's Information Technology team to configure an LDAP user with the proper read permissions and set the LDAP server's security configuration to allow PhishingBox to connect.
- Integrating an account with an LDAP server
- Integrating a group with an LDAP server
- Field mappings
- Troubleshooting
- NOTE: Google Workspace LDAP service requires certificate authentication, which is not currently supported by PhishingBox. In order to connect the PhishingBox LDAP client to a Google Workspace LDAP service, you must use Stunnel as a proxy which will allow username/password authentication. See the following articles for more information.
Please be aware that your domain controllers need to be accessed from the internet!
Integrating an account with an LDAP server
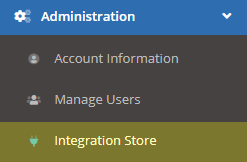
To get started integrating an account with an LDAP server, navigate to Administration > Integration Store in the PhishingBox portal.
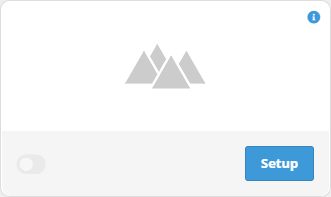
Under the card containing the LDAP logo, click the 'Setup' button.
This will open the LDAP configuration form. You will need the following information to connect to the LDAP server:
- The server's IP address or domain.
- An open port with which to connect to the server (389 default).
- An LDAP username and password that has permission to read the directory.
- The base DN of the server.
- The type of security protocol used to connect to the server.
- The directory type.

If there are more than 250 groups in the directory, then you will pick groups using a search box (as shown below). If there are 250 or fewer groups in the directory, then all the groups will be displayed for you to choose from.

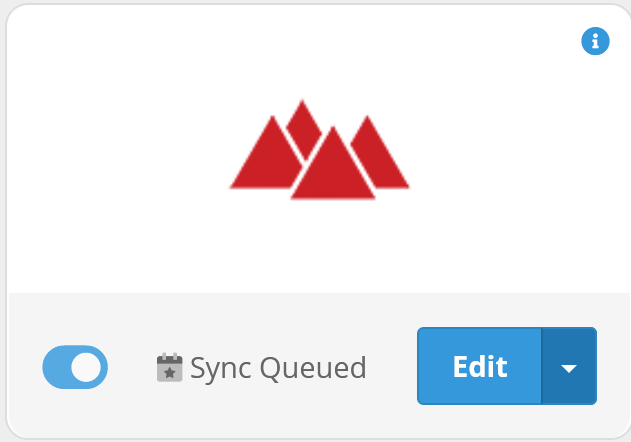
If you want to sync to commence immediately after saving, set the 'Active' switch to 'Yes'. This will cause the sync to be queued (when a sync is "queued", that means it is scheduled to be synced in; the sync usually completes within minutes of the sync being queued, but can take longer depending on how many targets are being pulled into the Portal). When the sync is finished, an integration_sync_finished email will be sent to the Account Manager Email (set on the Notifications tab on the Account Settings page).
After completing the form, choose whether you would like to sync by the server's groups, organizational units (OUs), or all users on the server (Base). Click the 'Test' button to connect to the server. If a successful connection is made and you chose to sync by group or OU, the server's groups or OUs will be displayed in a multi-select menu. Select the groups or OU's you wish to sync, then click 'Save' to save the configuration. If you chose to sync by base, no groups or OUs will need to be selected.
- NOTE: Make sure you select the correct sync type before saving! After saving, you will have to contact support to reconfigure the sync.
If the 'Active' switch is set to 'Yes' the sync will be queued. One Portal group will be created for every group or OU you chose to sync having the same name and containing all the users from the respective group or OU. If you chose to sync by Base, a single group will be created containing all users in the LDAP server named "Base".
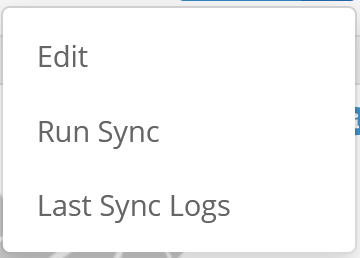
If you did not set the 'Active' switch to 'Yes', commence the sync by clicking the 'Run Sync' link, located in the integration card's drop-down menu. This will queue the sync. You can view the results of the last time the integration was synced by clicking on "Last Sync Logs" in the drop-down. When the sync is finished, an integration_sync_finished email will be sent to the Account Manager Email (set on the Notifications tab on the Account Settings page).
Integrating a group with an LDAP server
To import from LDAP to a single group you will need to create a new group through the Add Group page, or you can edit an existing group and add the integration.
Once you enter a name for the group, click on the Third-Party Integration tab and choose "LDAP" from the Import Type dropdown menu.
The form fields presented for a group-level sync are identical to the fields presented in section: Integrating an account with an LDAP server.

Test Configuration
Once you have entered the required information, click on Test Configuration to test the connection.
If a connection is made, the number of users found in the base DN will be displayed in the Group Targets box. Additionally, new options on how you want to pull users will be displayed. You can either select the users from the base DN, a specific group, or a specific OU. If there are connection errors, they will be displayed here.

Field mappings
LDAP field mappings are listed in the table below.
| Target Field | LDAP Field |
| last_name | sn |
| first_name | givenName |
| title | title |
| company | company |
| department | department |
| manager | manager |
| zip | postalCode |
| address_one | streetAddress |
| phone_business | telephoneNumber |
Troubleshooting
Can't contact LDAP server
The PhishingBox portal server cannot find the LDAP host. Ensure that the given LDAP server port is open to traffic from 54.80.160.189 (US) or 54.93.55.235 (EU).
Cannot authenticate
If the LDAP interface throws authentication errors, try using the distinguished name of the LDAP bind user in the bind user field.