To view test details, first go to the Manage Tests page (Tests/Campaigns > Manage Tests). You can then get to test details page in one of three ways:
- Clicking on the name of the test.
- Clicking on the View button in the Actions column.
- Clicking the drop-down in the Actions column and choosing View Details.
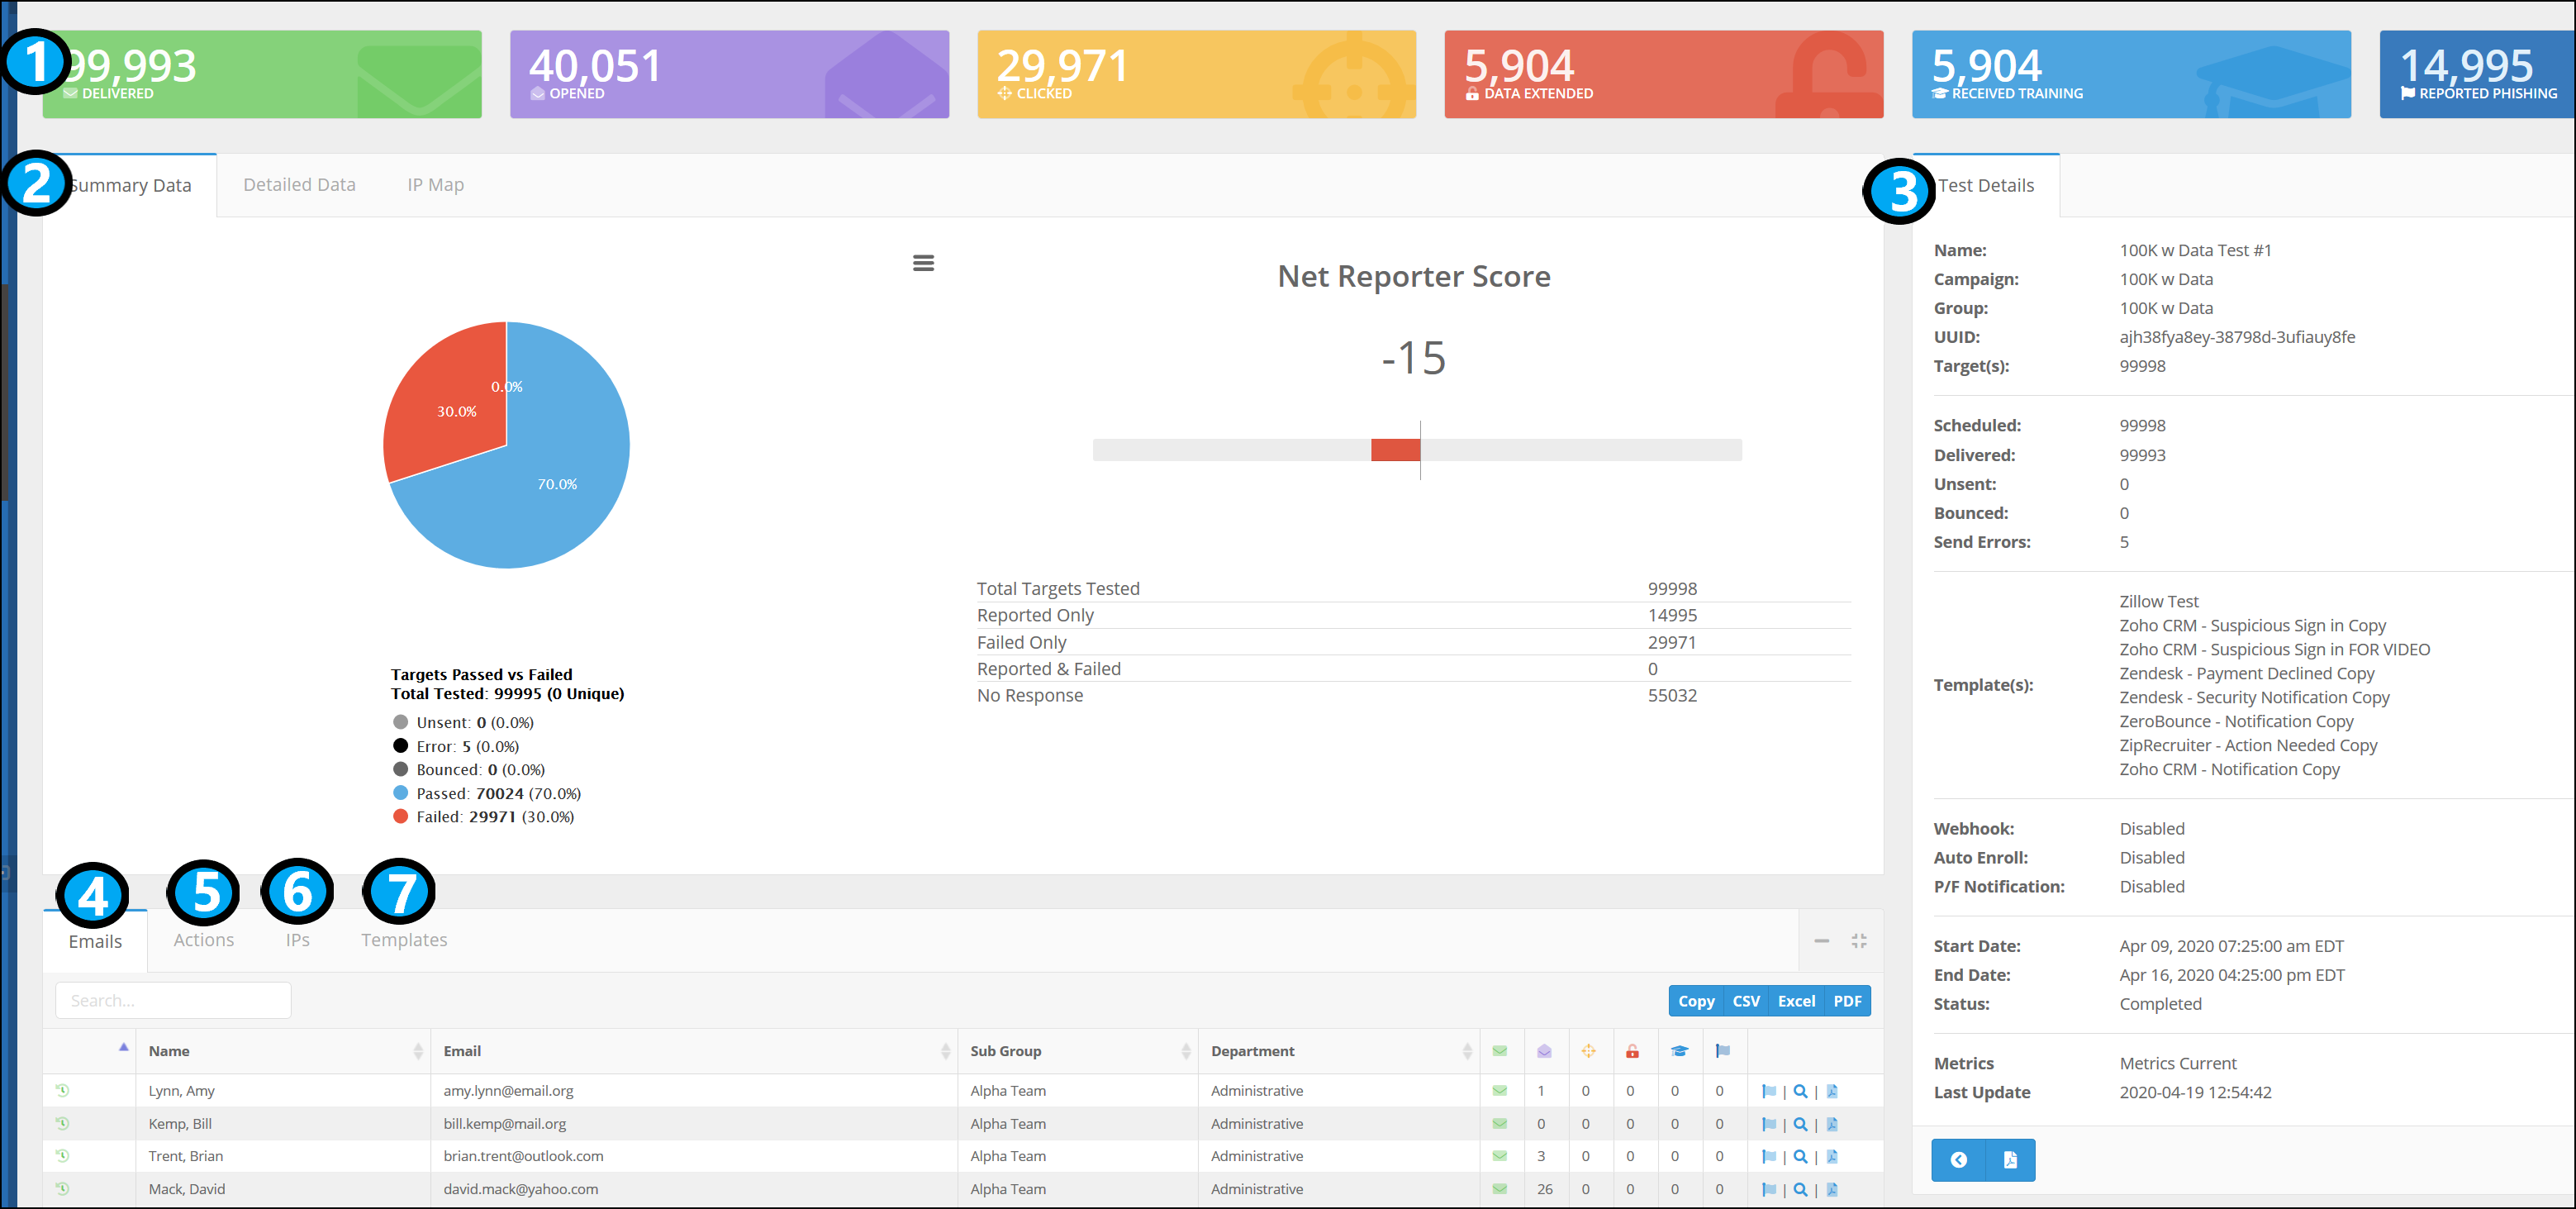
The test details page should look similar to the below screen:
Read about each of these sections by following one of the below links.
1. Emails Summary
From top-left to top-right is the number of delivered emails (green), opened emails (purple), clicked links in emails (yellow), data extended (red), received training (light blue), and reported phishing (dark blue) (read more about these terms in this article).
2. Summary Data, Detailed Data, and IP Map
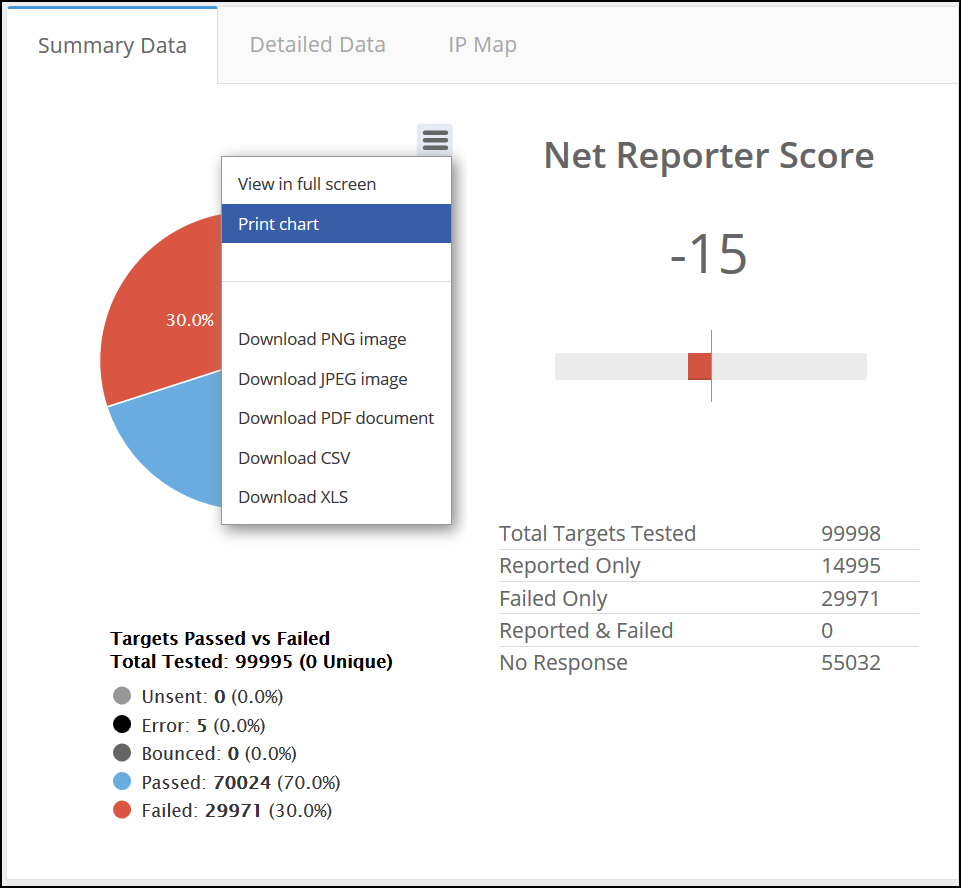
In the Summary Data tab is a pie chart of your targets pass/fail rate, as well as the Net Reporter Score of the test. You can click on the menu button beside the pie chart to view the chart in fullscreen, print the chart, or download the chart as a PNG, JPEG, PDF, CSV, or XLS file.
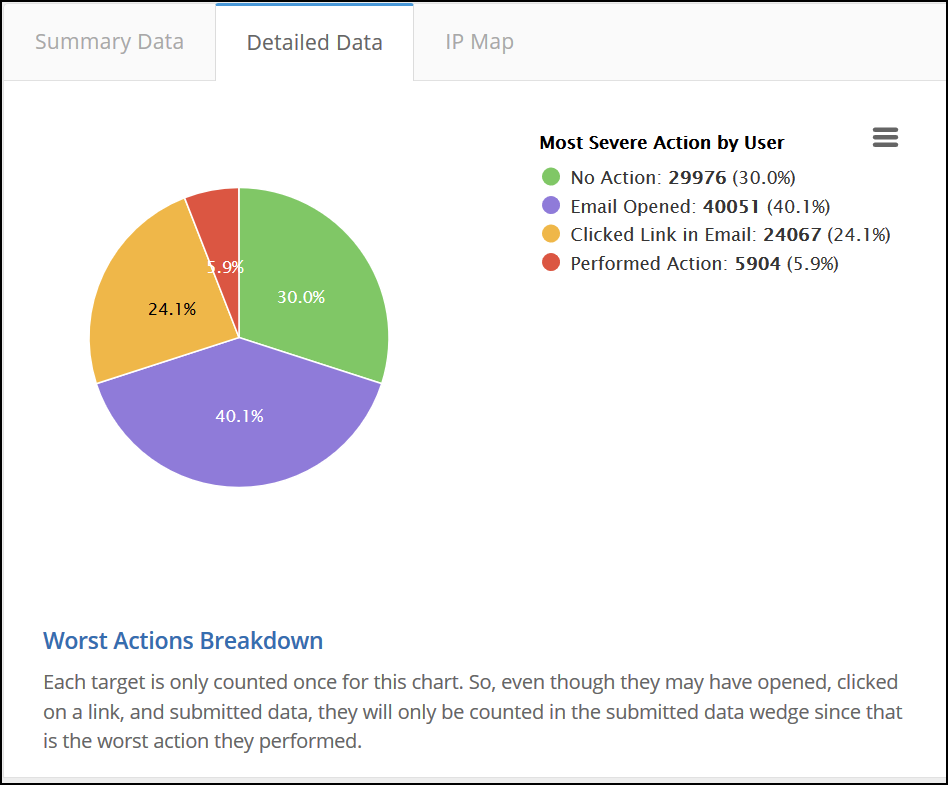
The Detailed Data tab shows a more in-depth look at your targets' breakdown by actions. You will again have the option of viewing the chart in fullscreen, printing the chart, or downloading the chart.
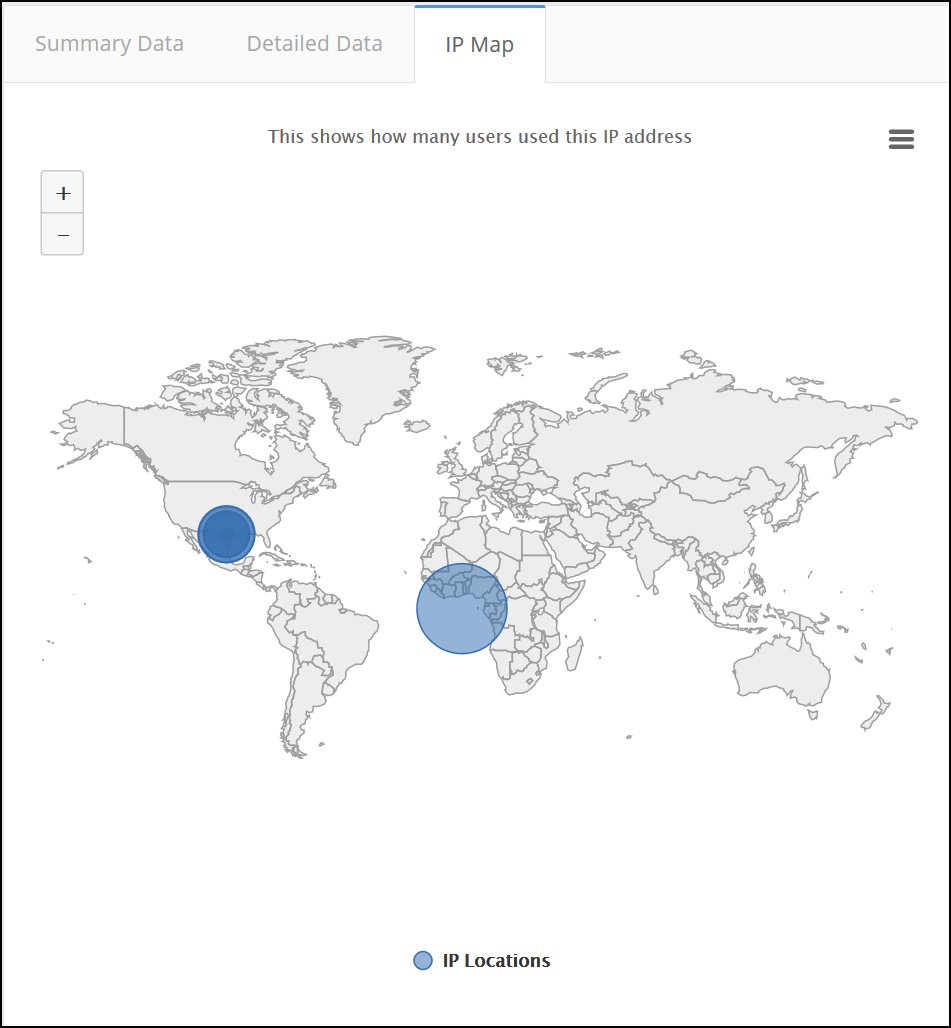
The IP Map tab plots the IP addresses of actions. You can zoom in/out on the map. This map also has the option of being opened in fullscreen, printed, or downloaded. Additionally, you can open the map in Highcharts Cloud.
3. Test Details
The test details section describes the test settings. It shows the test type (phishing or training), test name, campaign name (if clicked, you will be taken to the Campaign Details page), group name, test UUID, number of targets, number of scheduled/delivered/unsent/bounced emails, sending errors, templates used, webhook URL, auto-enroll, pass/fail notifications, start and end date/time, status (In Progress, Scheduled, Completed, etc.), metrics status, and the last time the metrics were updated.
At the bottom, you have the options to go back to the previous page or view an Executive Report of the test data by clicking on the Acrobat icon.
To the right of the Test Details tab is the Sending Details tab. This shows number of scheduled, delivered, unsent, bounced, and emails that were not sent due to an error.
If the test has auto-enroll configured, then there will be a Course Details tab to the right of the Test Details tab. The Course Details tab will show which course(s) targets will be enrolled into on certain fail action types.
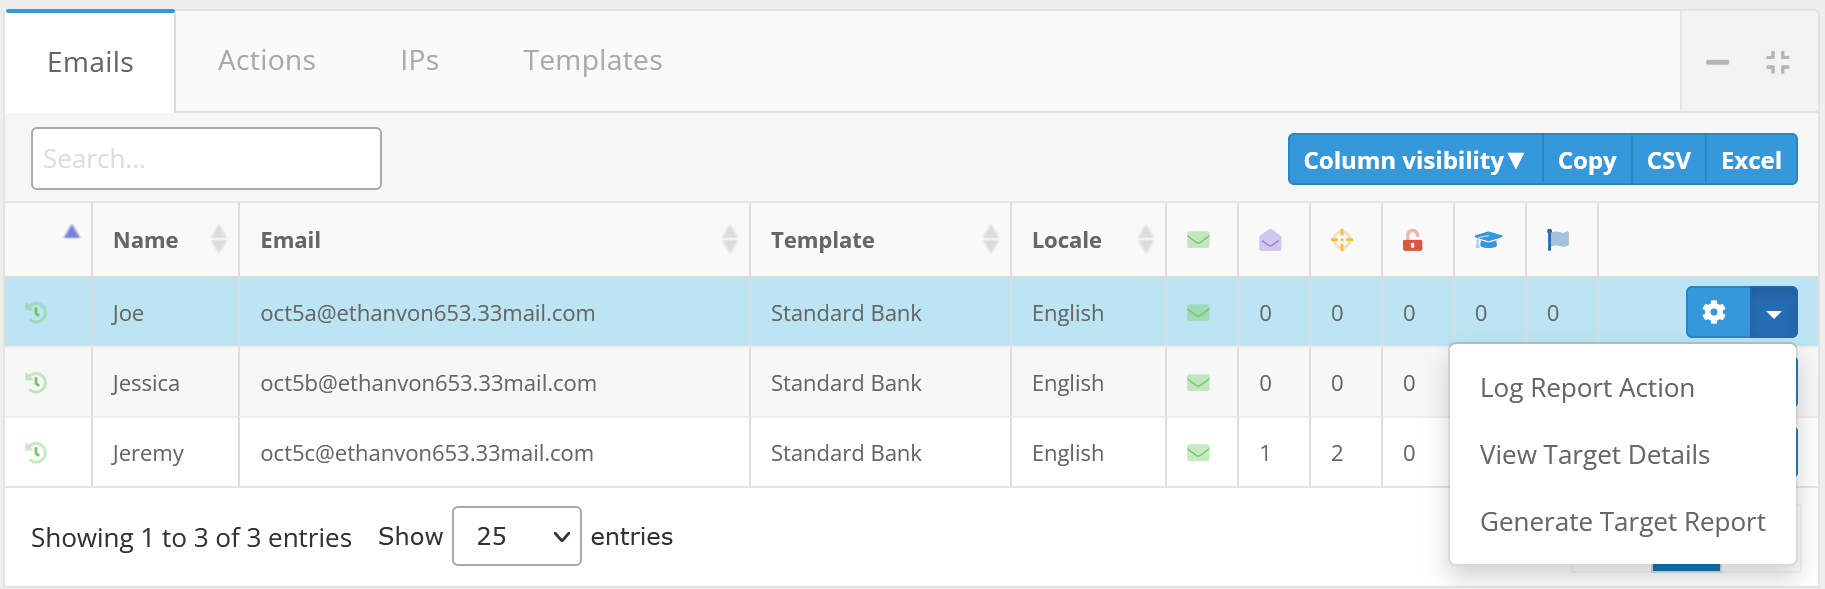
4. Emails
The bottom part of the Test Details page provides detailed data about the emails sent to each target in the test. It shows whether the metrics are current and when the metrics were ran on that email, the associated target name, email address, sub group, department, number of emails delivered/opened, number of times links were clicked in the email, data extended, training received, and whether the target reported the email as phishing (read more about these terms in this article).
To the right of the email details is a drop-down containing three buttons: Log Report Action (which will cause the email to that target to show up as reported on the test; if a report action has already been logged, then this button will be Unlog Report Action), View Target Details (which will take you to the target details page for that target), and Generate Target Report (which will generate an Individual Target Report on that target).
Above the list of emails are three more icon buttons: Copy, CSV, Excel, and PDF. The Copy button will copy the emails data to your clipboard. The CSV, Excel, and PDF buttons will each download/open the data as CSV, Excel, or PDF files.
5. Actions
The Actions tab shows a breakdown by action for the test. It shows the email associated with the action, the date/time of the action, the action type (Email Opened, Reported, etc.), the IP address associated with the action, a breakdown of user-agent information, any filters applied to the action, AHD fingerprints, and current status. You can mass select actions from this tab and manually verify them.
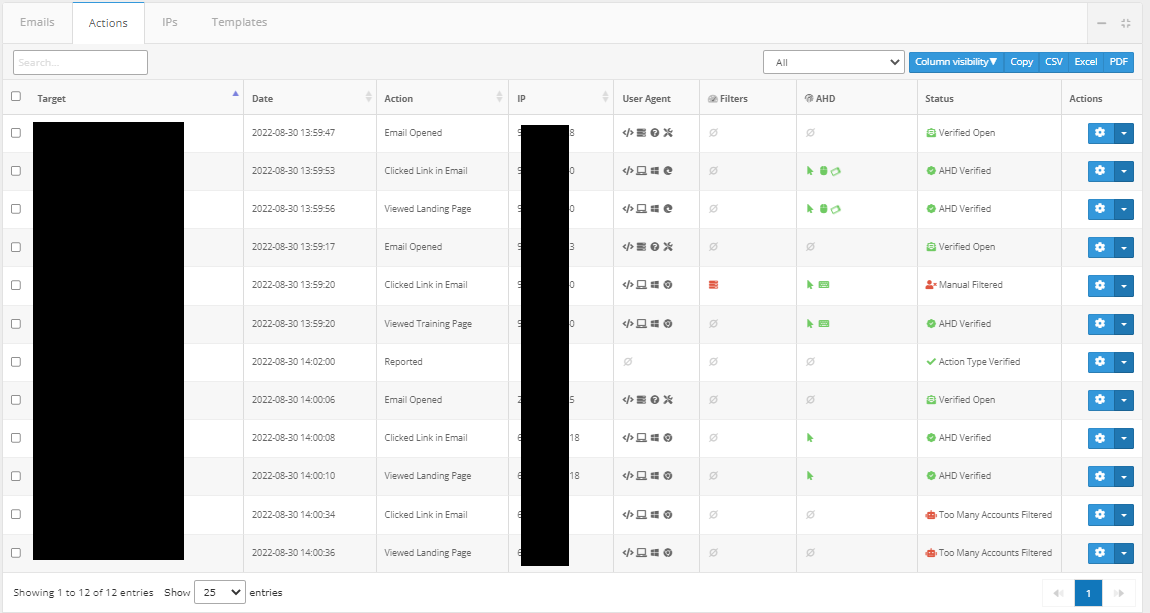
By default, only actions that are Verified (or simply counted for older tests) will show. You can view Suspicious, Filtered, or All actions by using the select box at the top of the tab. Additionally, you can choose to show or hide various columns by using the "Column Visibility" dropdown at the top of the tab.
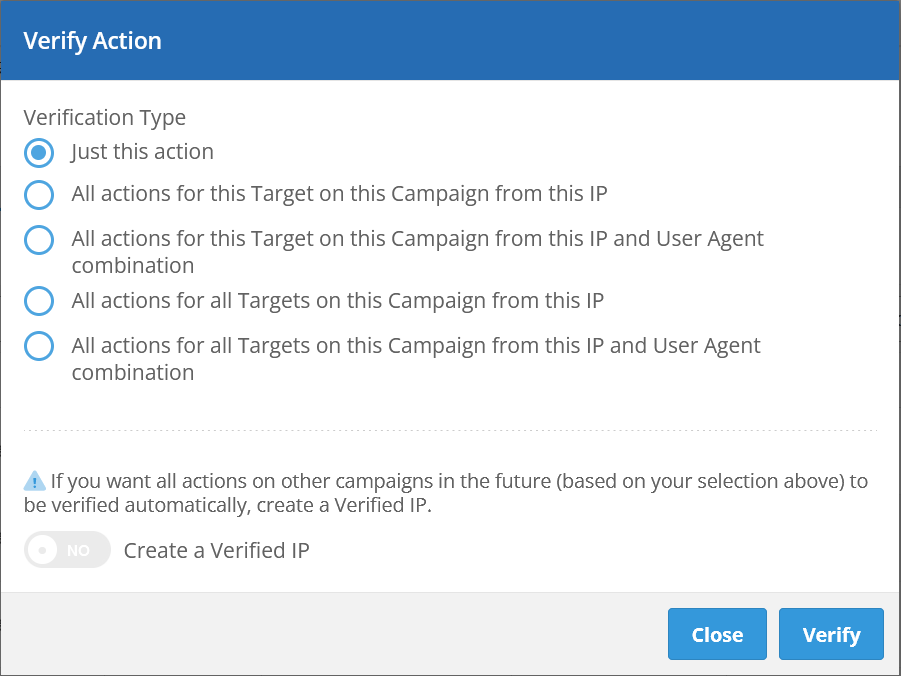
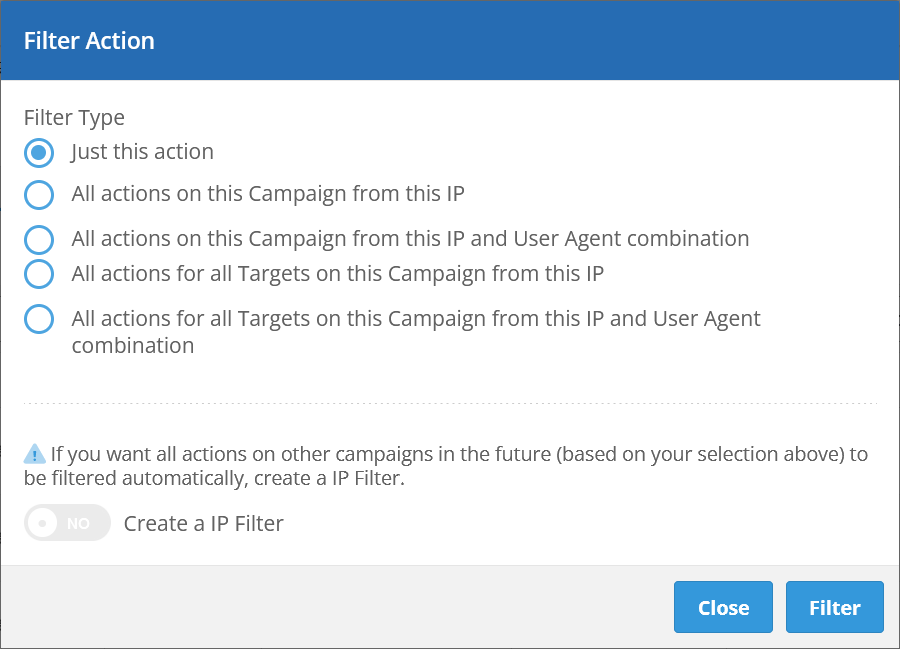
You can manually verify/filter actions by using the buttons in the Status column or the links in the dropdown menu. A modal will open that will allow you to select additional actions based on matching Campaign/IP/User-Agent combinations. Additionally, you can choose to create a corresponding IP Filter or Verified IP based on the same conditions. From the dropdown menu, you can also choose to delete an action. WARNING: Deleting an action cannot be undone!
To get a deeper understanding of how AHD works, take a look at the article here Advanced Human Detection (AHD).
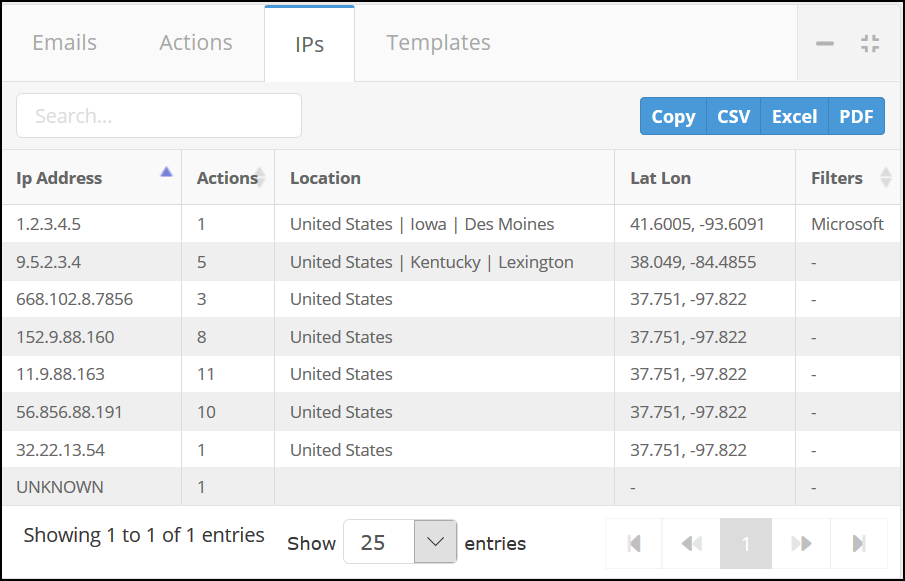
6. IPs
This section shows detailed information about the IP address from which the test actions originated. It shows the number of actions associated with each IP address, as well as the location, latitudinal and longitudinal location of the IP address and its filter. You may copy the IP data to your clipboard by clicking on the Copy icon button. You can download or open the IP data as CSV, Excel, or PDF file by clicking the appropriate button. The far-right column tells whether or not the IP is filtered out from the counts and why if it is (usually this will be blank). In the below image, the first action was filtered out because it was an action caused by Microsoft.
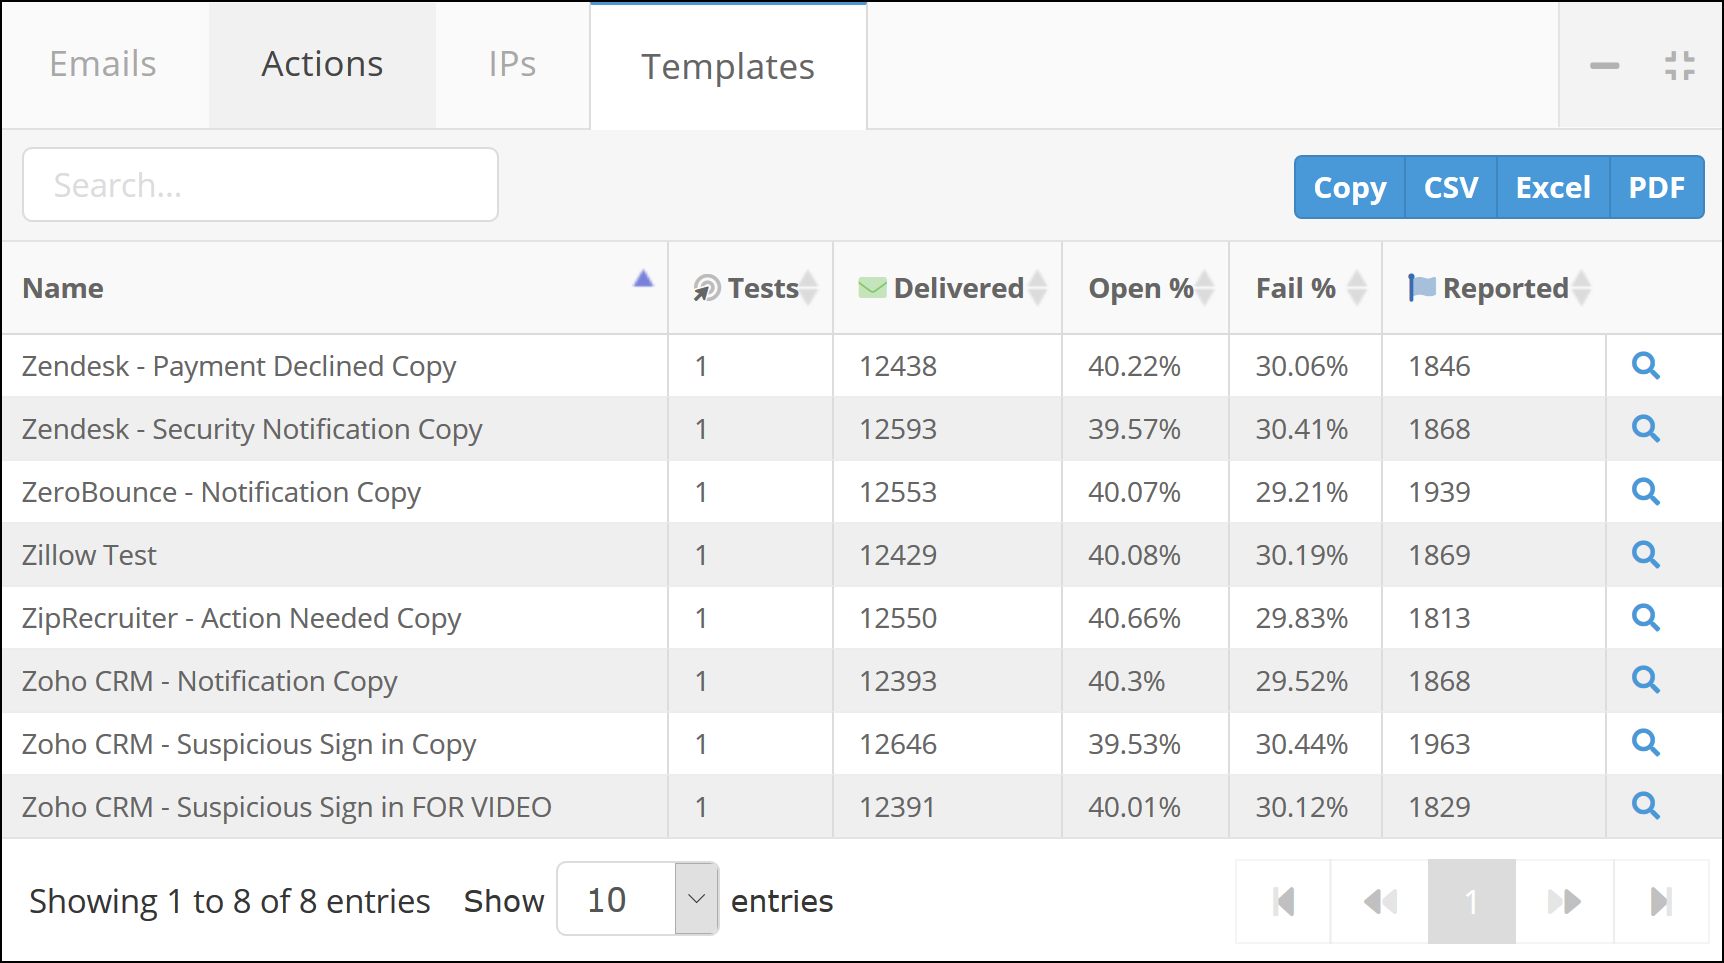
7. Templates
The templates section shows an overview of the templates used in the test. It shows the number of tests that that template was used in, the number of emails using each template, percent opened and failed, and the number of times that the template was reported as phishing. Clicking the magnifying glass will take you to the template. You may copy the template data to your clipboard by clicking on the Copy icon button. You can download or open the template data as CSV, Excel, or PDF file by clicking the appropriate button.