Integrating an Account with Litmos
If your organization utilizes Litmos, you can sync the Users/Groups and/or Courses with Portal. As an Administrator, this can provide time saving in User Management if Litmos is already managing your roster and provide a tie back in to Litmos to assign Litmos Courses as remediation training to targets who action on your phishing campaign emails.
Requirements
In order to take advantage of the Litmos integration, you will need to have Litmos Admin with “Account Owner” role to access your API information to configure the integration.
Integrating with Litmos
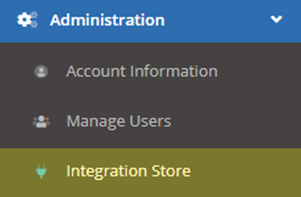
To get started integrating an account with Litmos, navigate to Administration > Integration Store in the Portal.
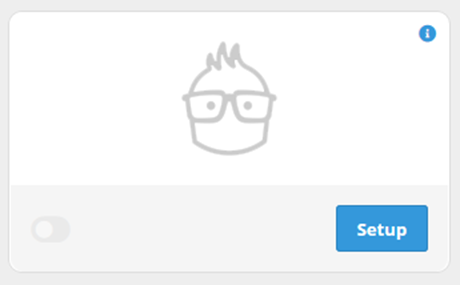
Under the card containing the Litmos logo, click the 'Setup' button.
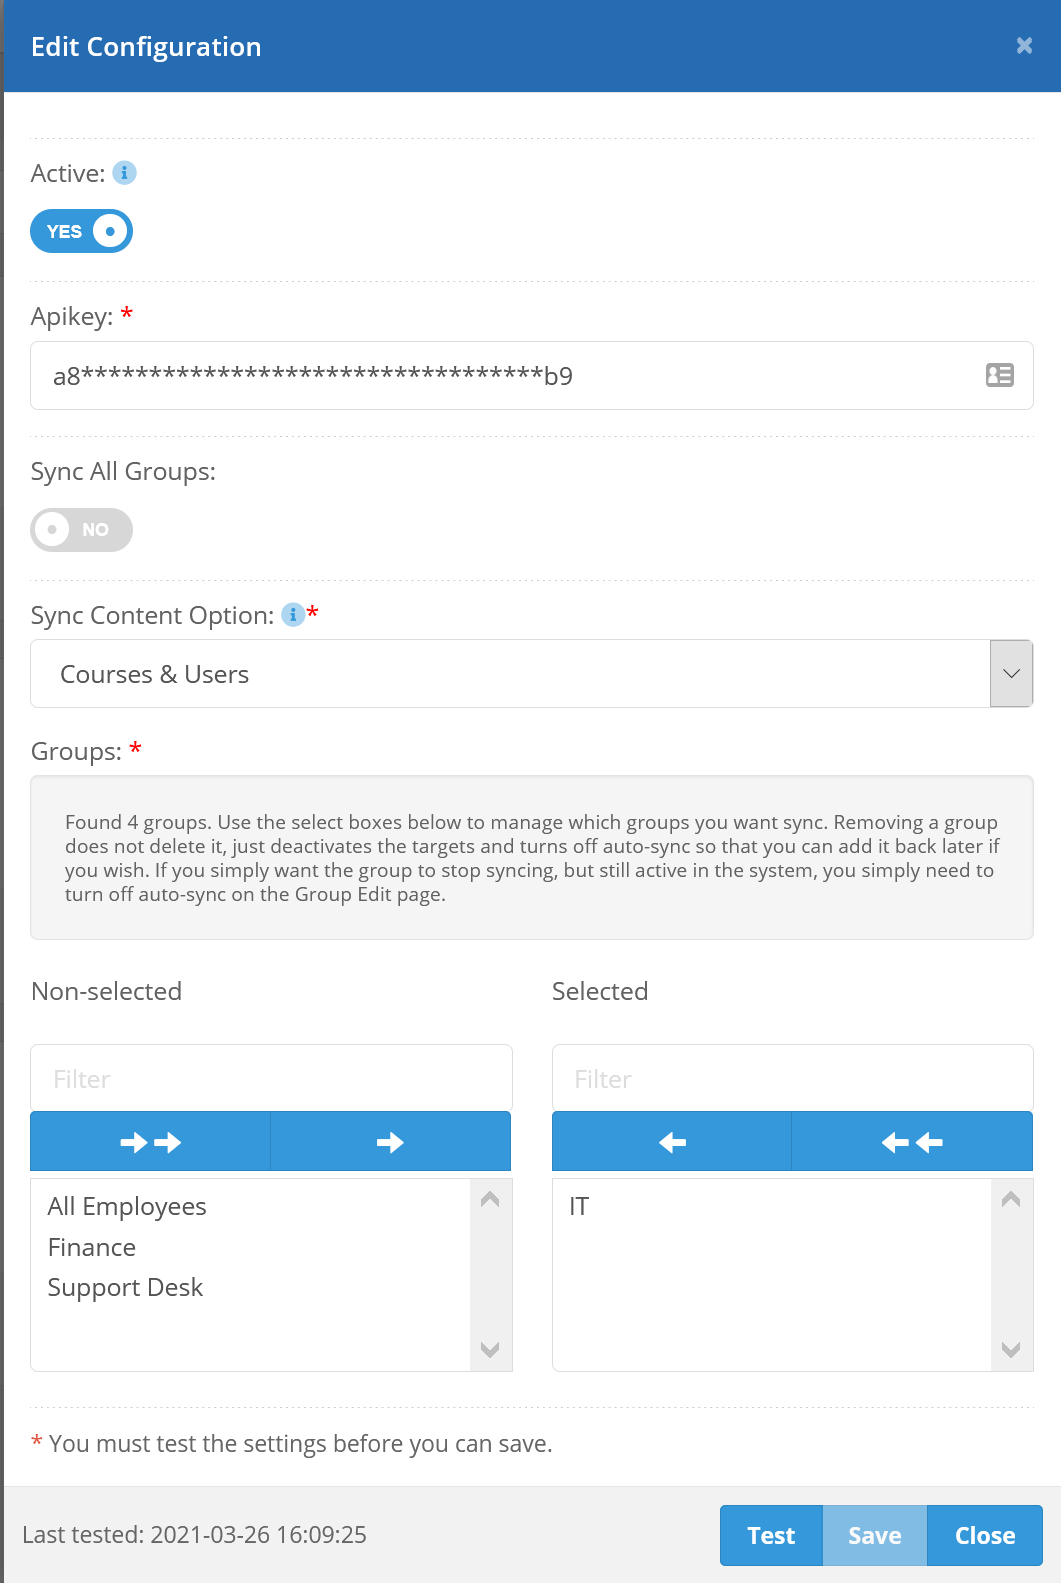
This will open the Litmos configuration form. You will need the following information to connect to Litmos:
- API key (You can find your API key under Account Settings > Litmos Features > API).
- At least one Team must be configured in Litmos
If there are more than 250 groups inside the integration, then instead of all groups being listed in the integration popup, you'll be presented with a search box, as shown below.

Active Status:
This determines if the integration is enabled for both initial configuration and changes to settings moving forward.
Sync Content Option: Determine if you intend to sync Courses Only or both Courses & Users
This determines what elements will be synced from Litmos into Portal.
- "Courses" allows you to sync only course information from Litmos. If you already managing users manually or with another integration (e.g., Microsoft Graph), this is the option you should choose.
- If you choose this option, you will also want to select "All Groups" on the Group Default LMS Connection for Auto-Enrolling option. This will assign the Litmos integration to auto-enroll option for all groups existing and newly created groups in your account. You can also select "None" if you want to manually select which existing groups will need to use Litmos for training auto-enrollment.
- "Courses & Users" allows you to sync both courses and users from Litmos. If you manage users and teams within Litmos that you would like to bring over to Portal, this is the option you should choose. This will also sync course information.
- If you choose this option, you will be able to select which groups and users within that you wish to sync over to Portal. By default, any groups that are synced will also enable “Auto-Sync” on the selected groups that will then update daily. Note: you will have the ability to disable this as discussed below.
- Groups will be created with the name as listed within Litmos. If you already have an existing group with the same name in Portal, this group will be overwritten with settings from Litmos. Note: any existing groups you may have created or any newly created group that doesn’t not match a group name within Litmos will not be affected.
- In order for Users to be synced, they must have a valid Email Address and belong to a group/team within Litmos.
How will Portal map User fields from Litmos?
|
Portal Field |
Litmos Field |
| integration_id |
Id |
|
|
|
|
first_name |
FirstName |
|
last_name |
LastName |
|
name |
FullName |
|
phone_business |
PhoneWork |
|
phone_mobile |
PhoneMobile |
|
address_one |
Street1 |
|
address_two |
Street2 |
|
city |
City |
| state |
State |
| zip |
PostalCode |
| country |
Country |
| company |
CompanyName |
| title |
JobTitle |
| timezone |
TimeZone |
| language |
Culture |
| manager |
ManagerName |
| optional_1 |
CustomField1 |
| optional_2 |
CustomField2 |
| optional_3 |
CustomField3 |
Select which Groups to Sync from Litmos
Sync All Groups: This determines if you want to sync all groups or manually select which groups to sync.

"Yes" will sync all groups from Litmos. This will also sync any newly created group(s) in Litmos going forward. When you save the integration after setting it to active, the sync will be queued.
"No" will open a select box from which you can select which Litmos groups you want to sync.
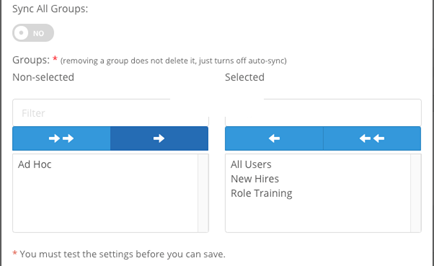
You will need to click the Test button to verify the connection before you can Save. Clicking Save will also run the sync at that time. You will have options to manually run this later as well as a daily Auto-Sync that will enable per group.
If you did not set the Active switch to "Yes", commence the sync by clicking the "Run Sync" link located in the integration card's drop-down menu. You can view the results of the last time the integration was synced by clicking on "Last Sync Logs" in the drop-down menu.
.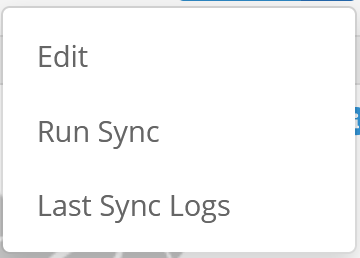
After clicking Run Sync, the sync will be scheduled (the integration card will read "Sync Queued"). When the sync is finished, an integration_sync_finished email will be sent to the Account Manager Email (set on the Notifications tab on the Account Settings page).

When the sync has completed, it will read "Synced".
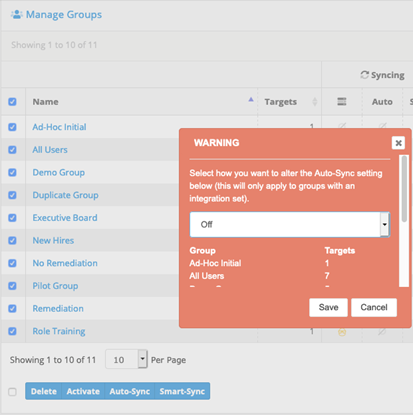
Disabling Litmos Integration and Auto-Sync for Groups
To disable the Litmos integration for any new changes, set the Active status to “No”. This will stop the Litmos integration for looking for any new changes. If you chose to sync “Courses & Users”, you will also need to turn off Auto-Sync on any existing group that was previously synced with Litmos.
- Turn Off Auto-Sync and/or Smart-Sync on Existing Groups: After setting your Litmos integration to sync “Courses & Users”, groups will be created with the Auto-Sync feature enabled. You will need to manually disable this Auto-Sync if you no longer wish to sync users from Litmos. Navigate to Manage Groups and select a checkbox to the left any group(s).